How to use ECL Connect & export files
Explore how to efficiently utilize ECL in Edge on Demand for exporting files effortlessly. From navigating through various sections to selecting export options, this guide will walk you through each crucial step for smooth operation.
Go to (yoursitename).edgeondemand.com
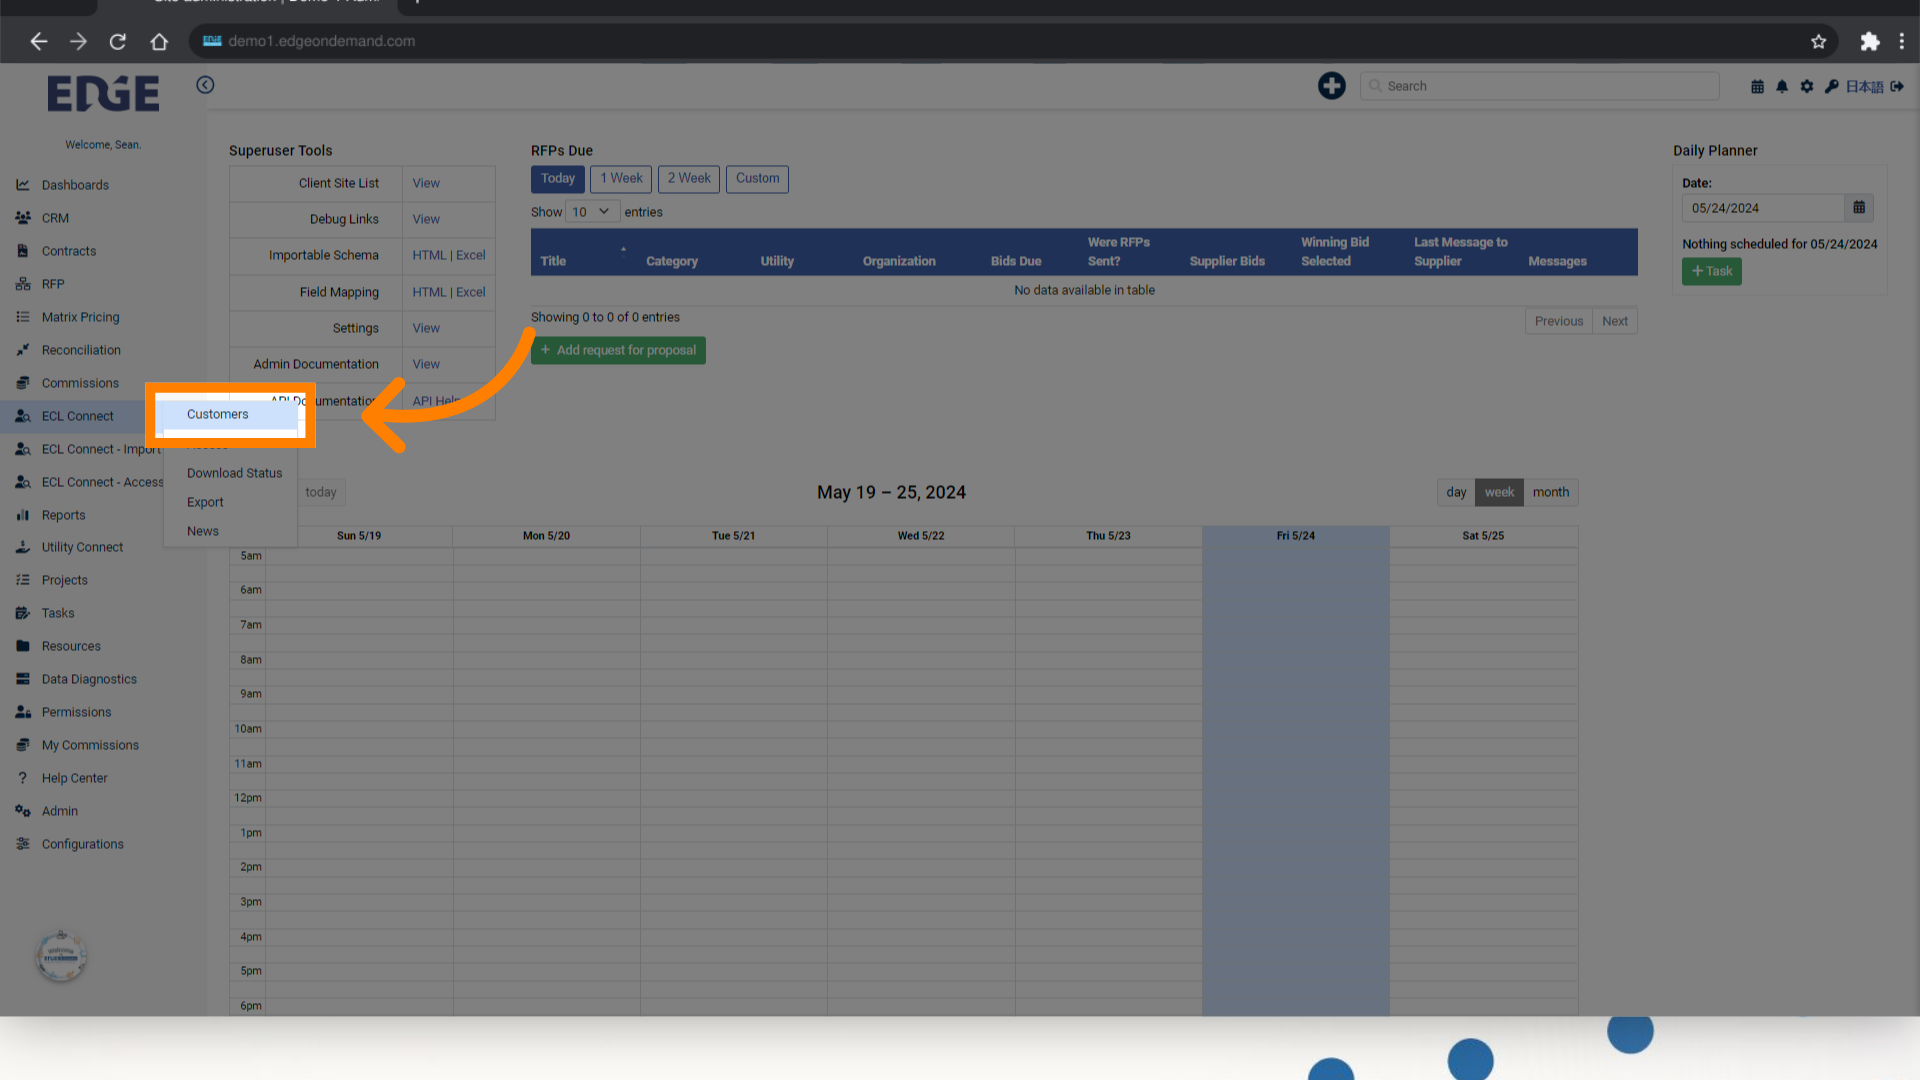
1. Click "Customers" in the ECL Connect sub menu
Navigate to the "Customers" section.
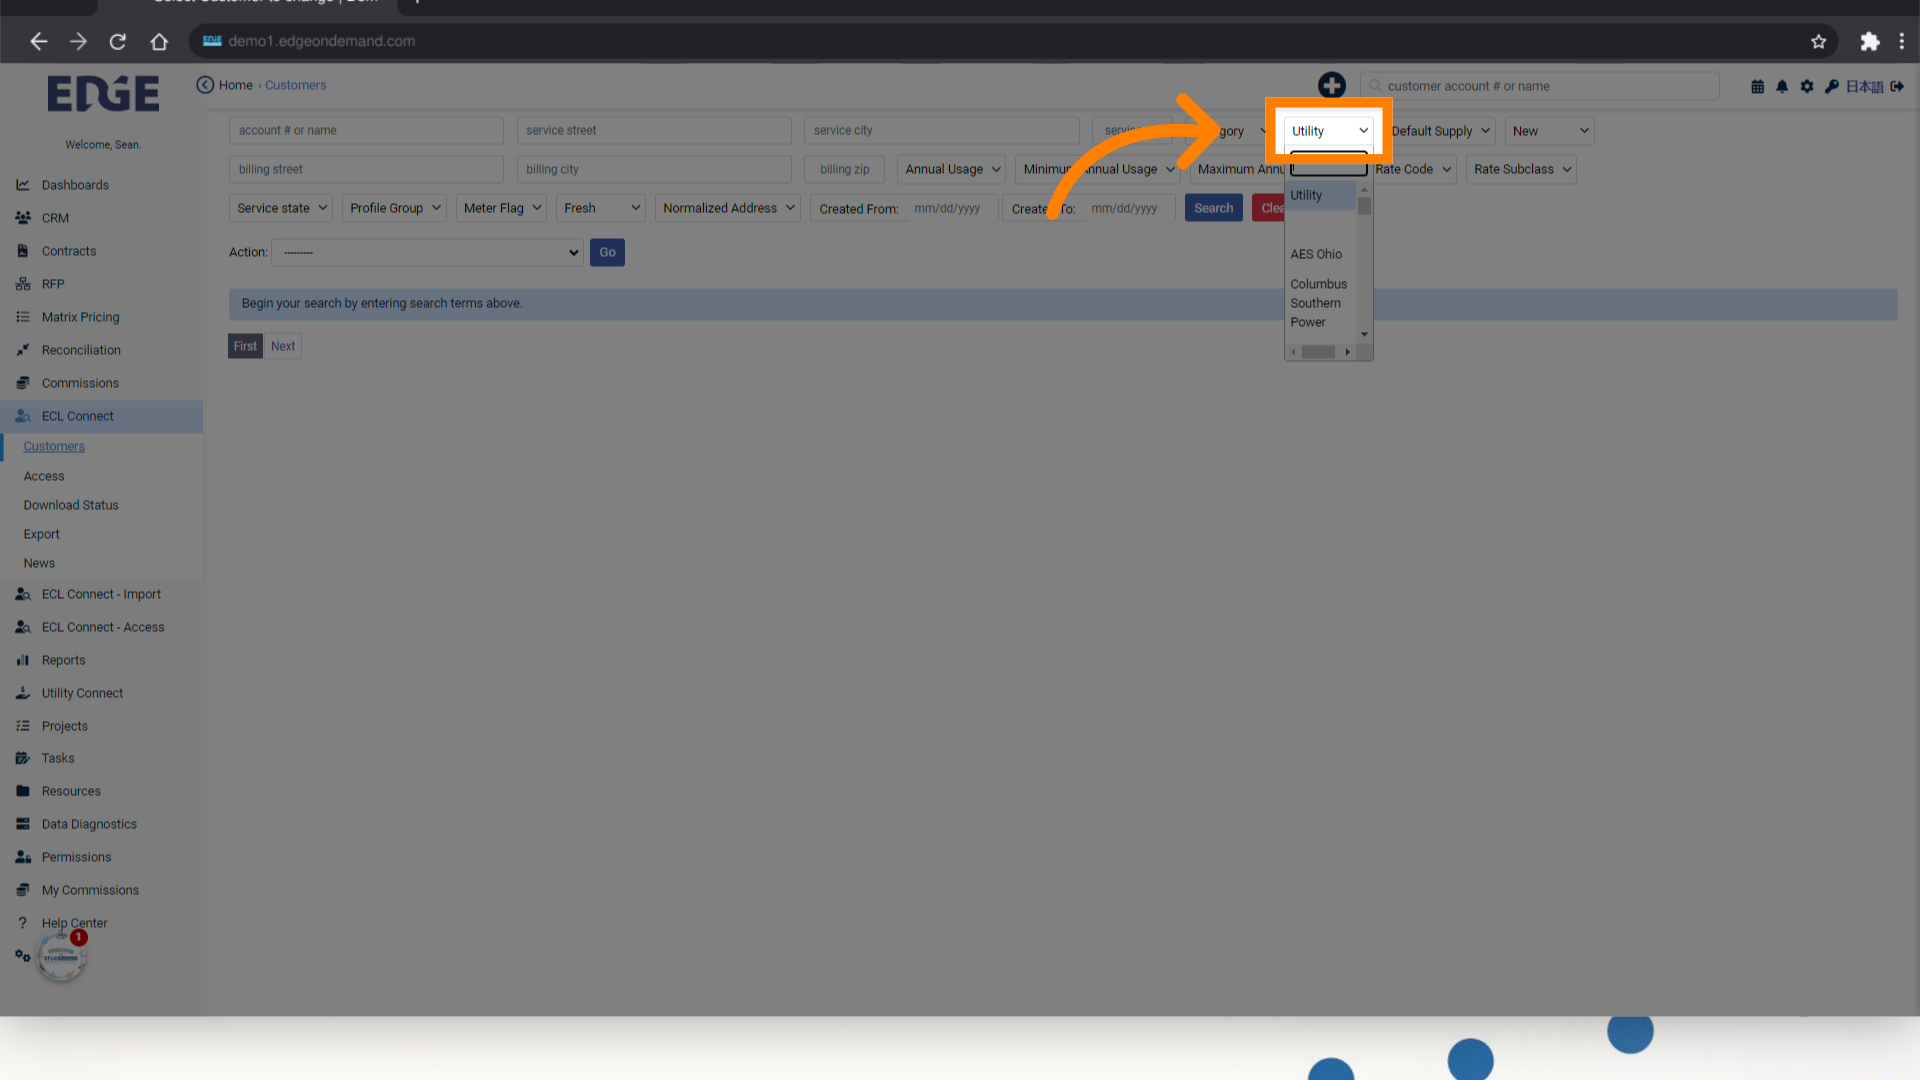
2. Select multiple filters to narrow your search
Access the exact customer(s) you are looking for
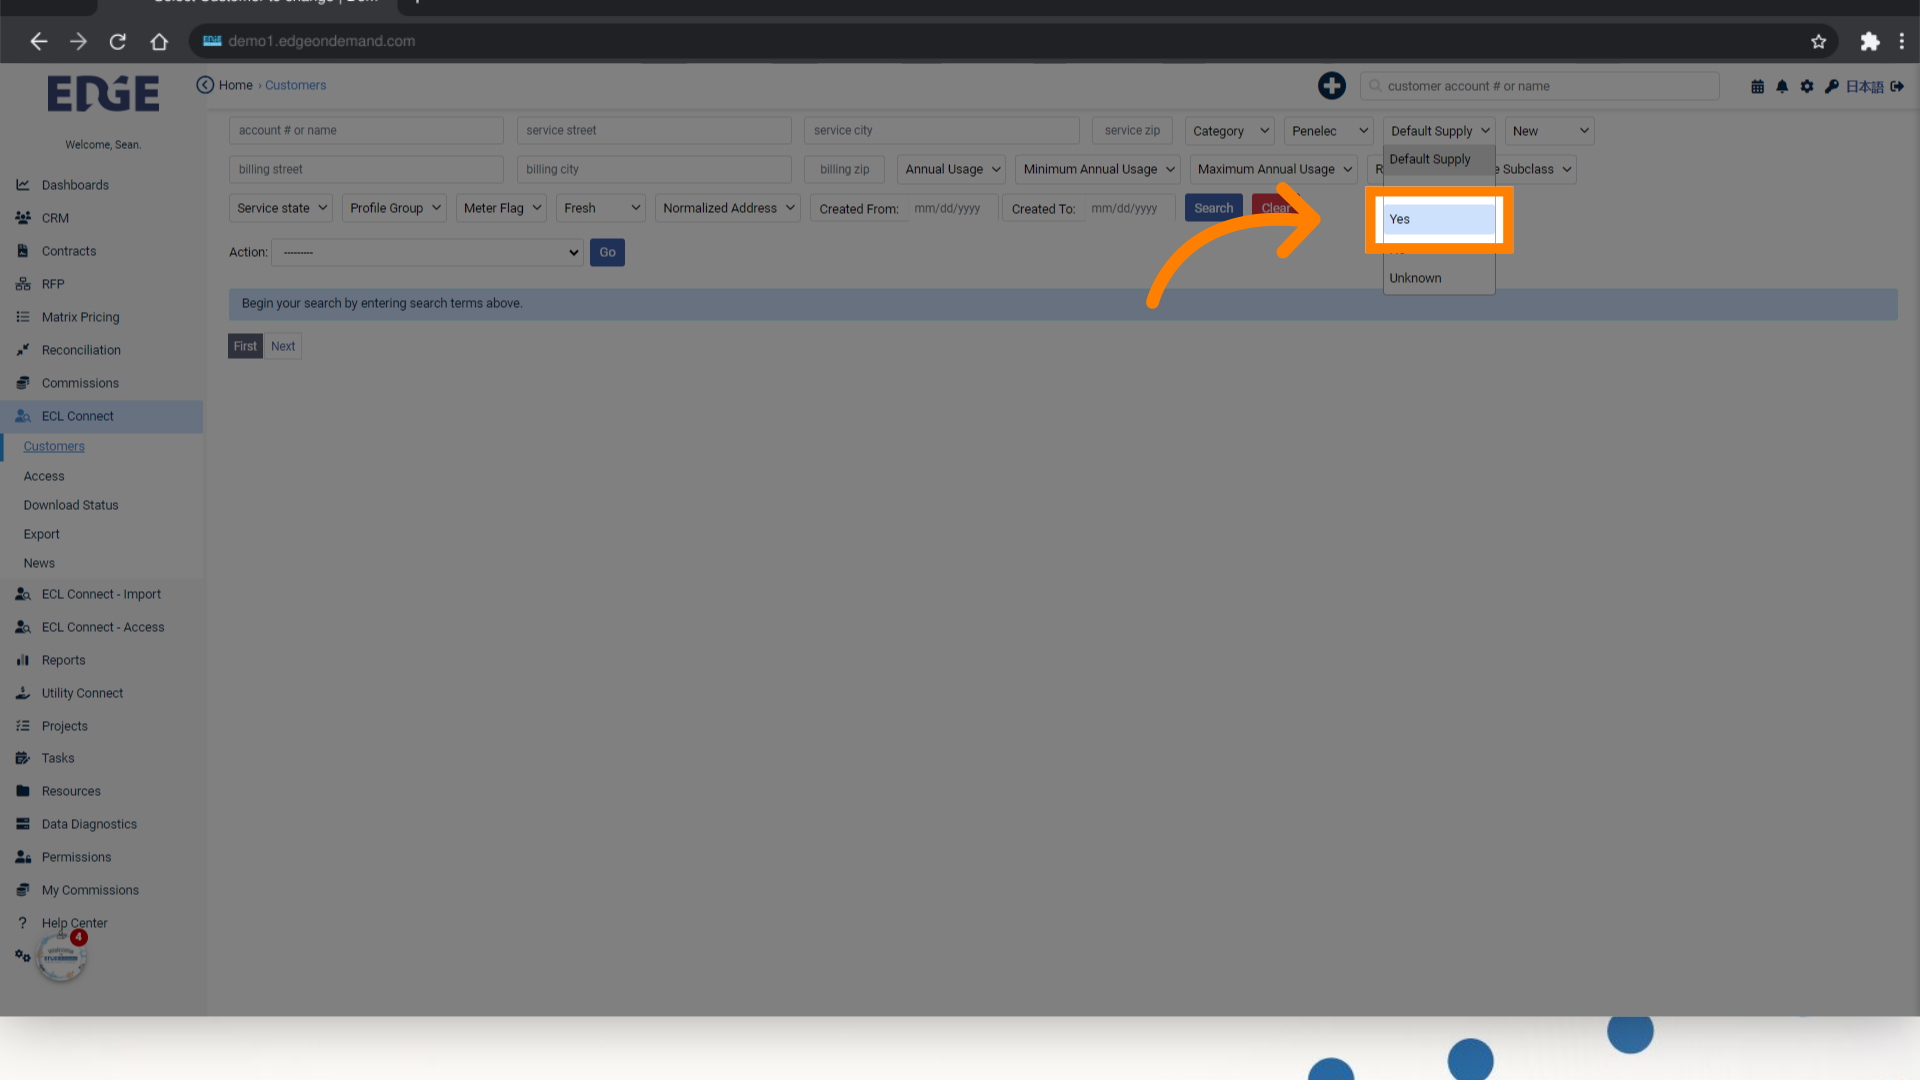
3. Click "Default Supply" (suggested filters)
Choosing "Default Supply" allows you to see customers who are straight with the utility and who have already selected a supplier.

4. Click "Yes" or "No"
Click on the "Yes" or "No" button
5. Click "Annual Usage" (suggested filters)
Select the "Annual Usage" tab.
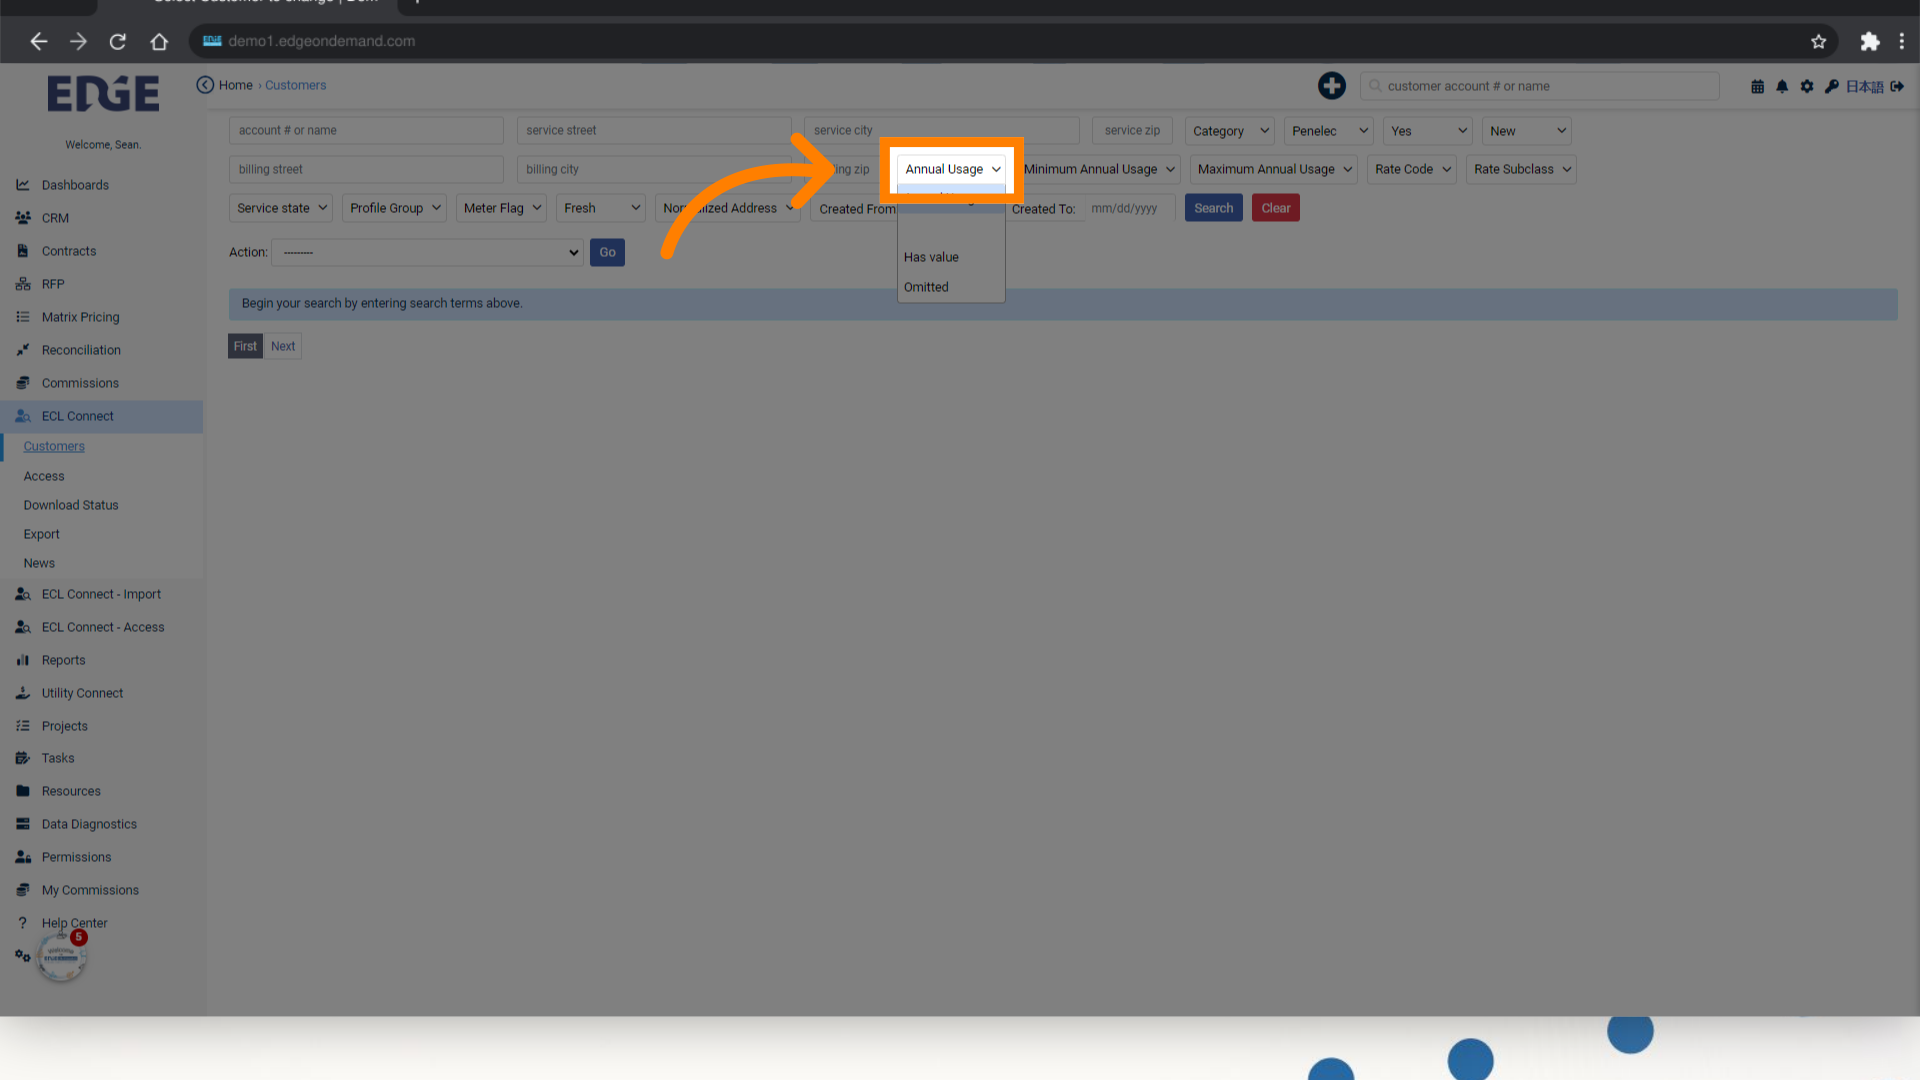
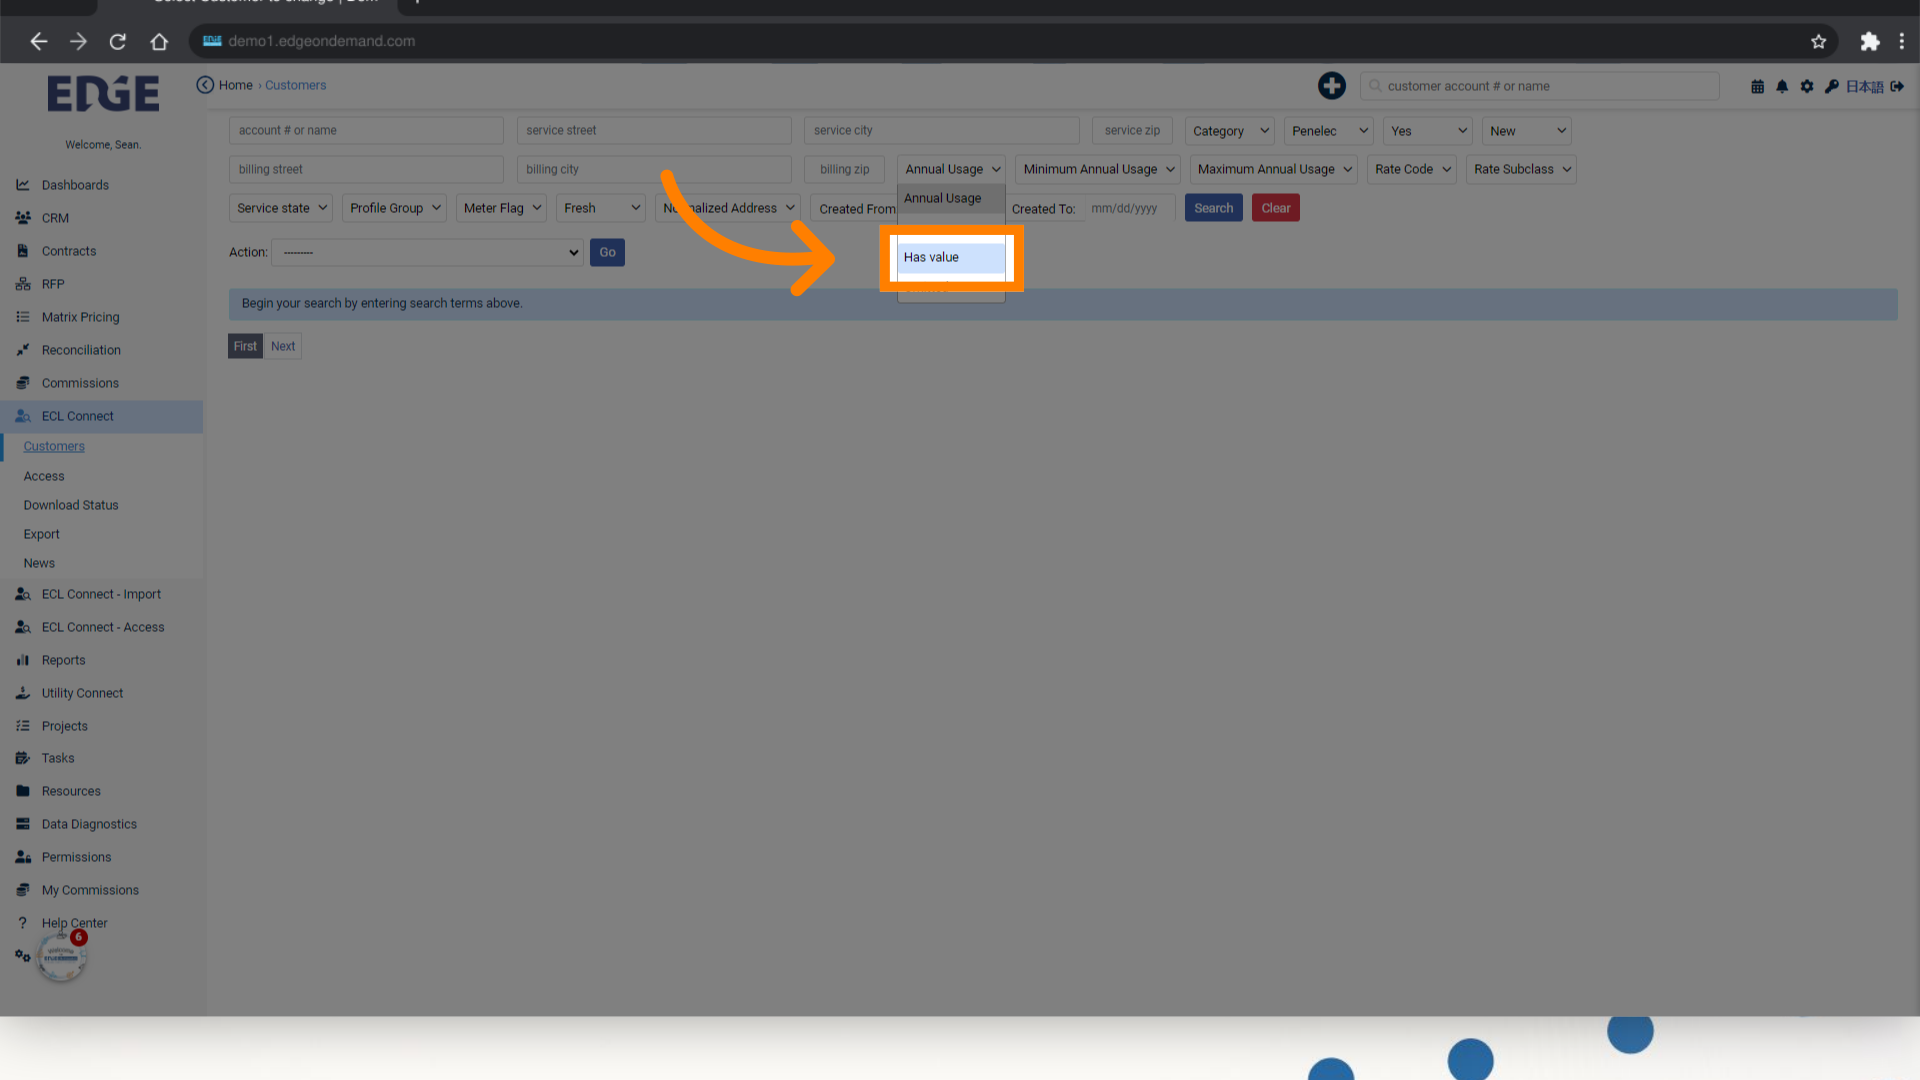
6. Click "Has value"
Choosing the option labeled "Has value" will filter for customers who have usages higher than zero.
7. Click "Minimum Annual Usage"
Navigate to the "Minimum Annual Usage" section.
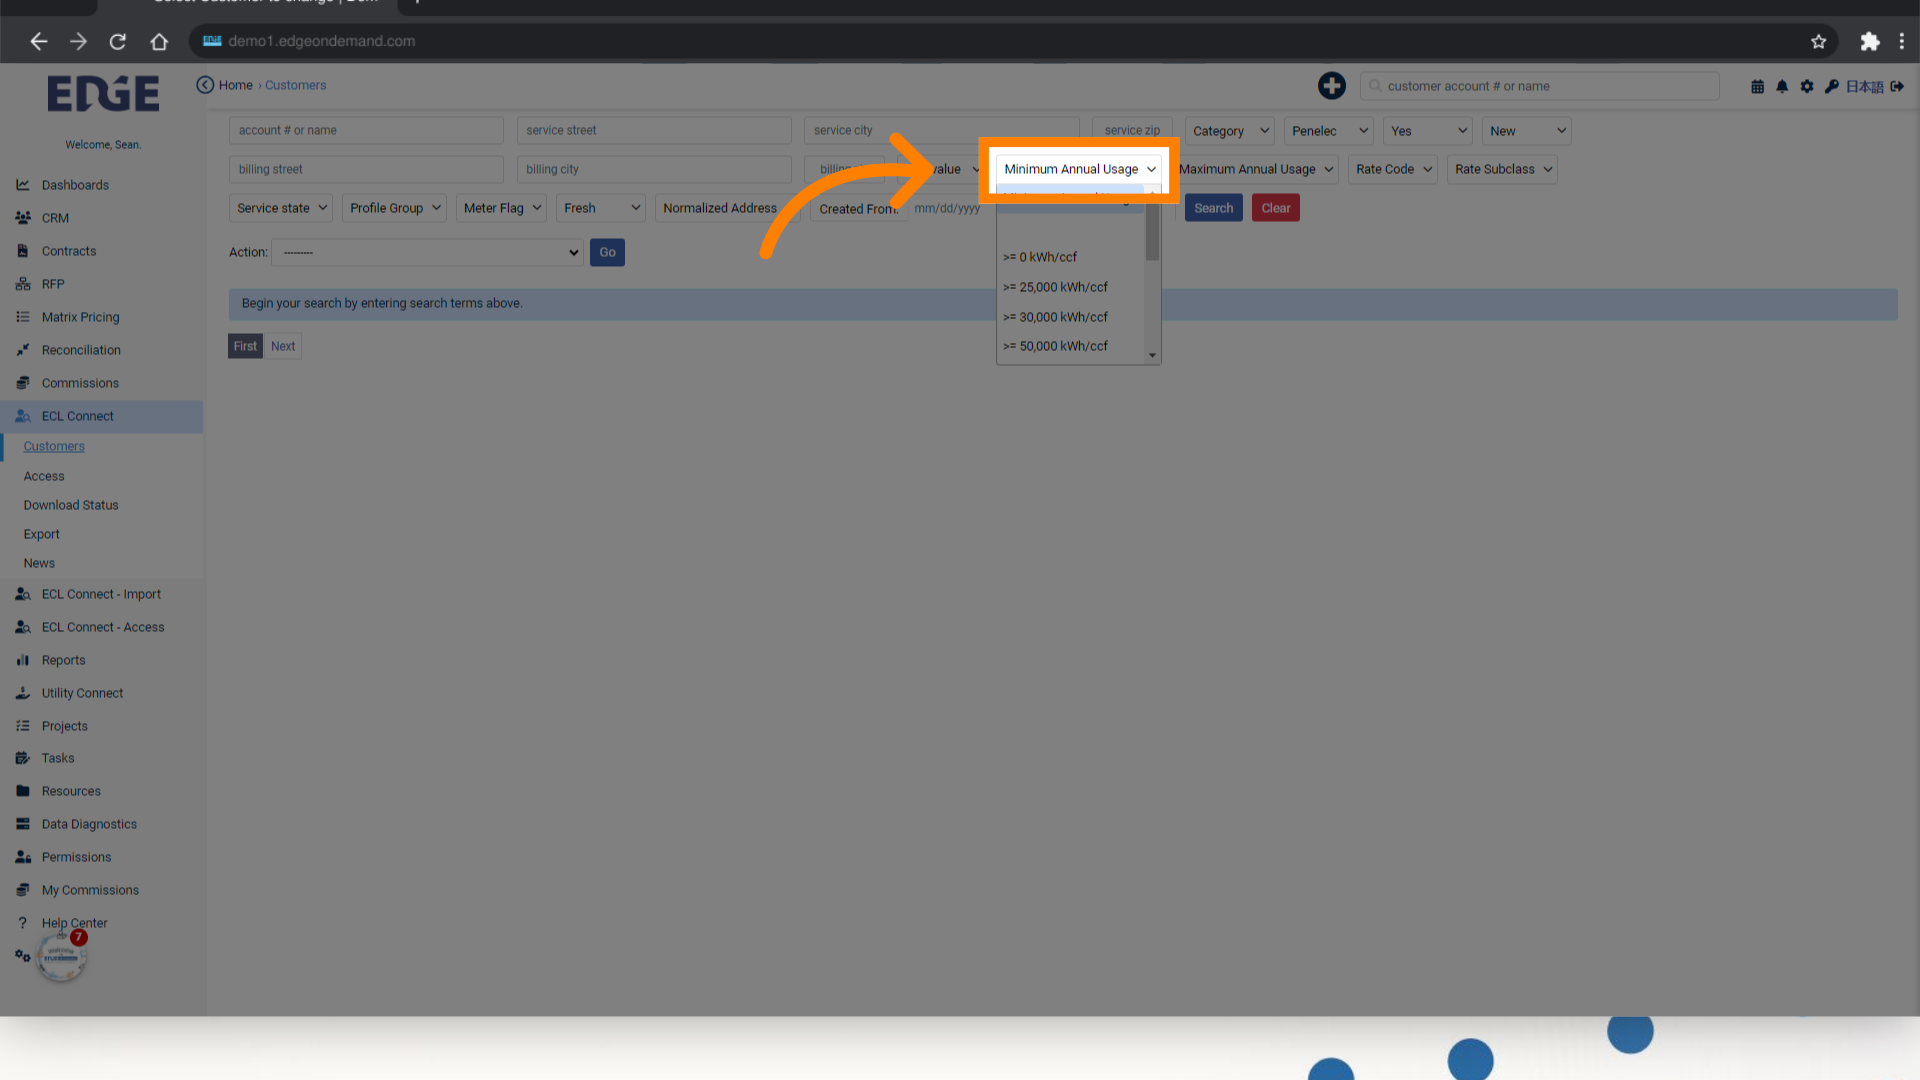
8. Select the Mimimum kWh value
Choose your option

9. Click "Maximum Annual Usage"
Navigate to the "Maximum Annual Usage" section.
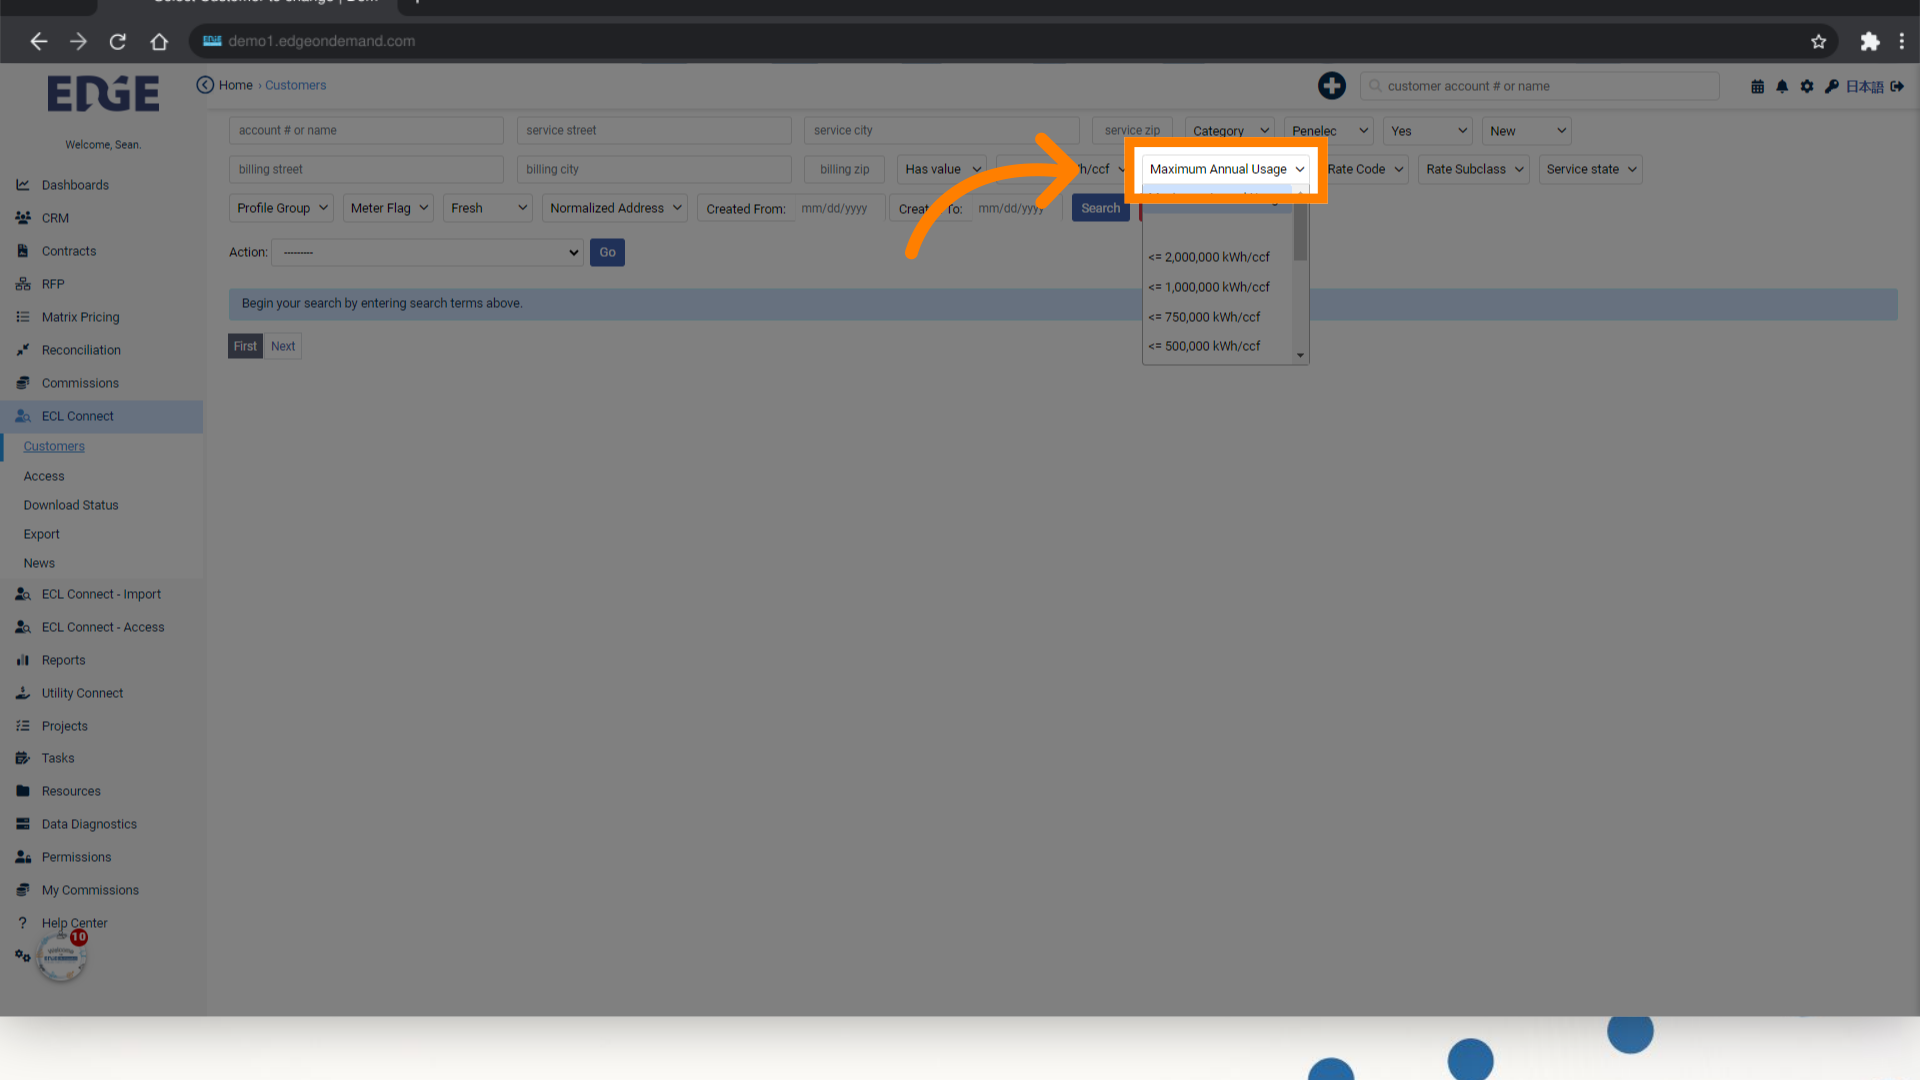
10. Select the Maximum kWh value
Choose your option

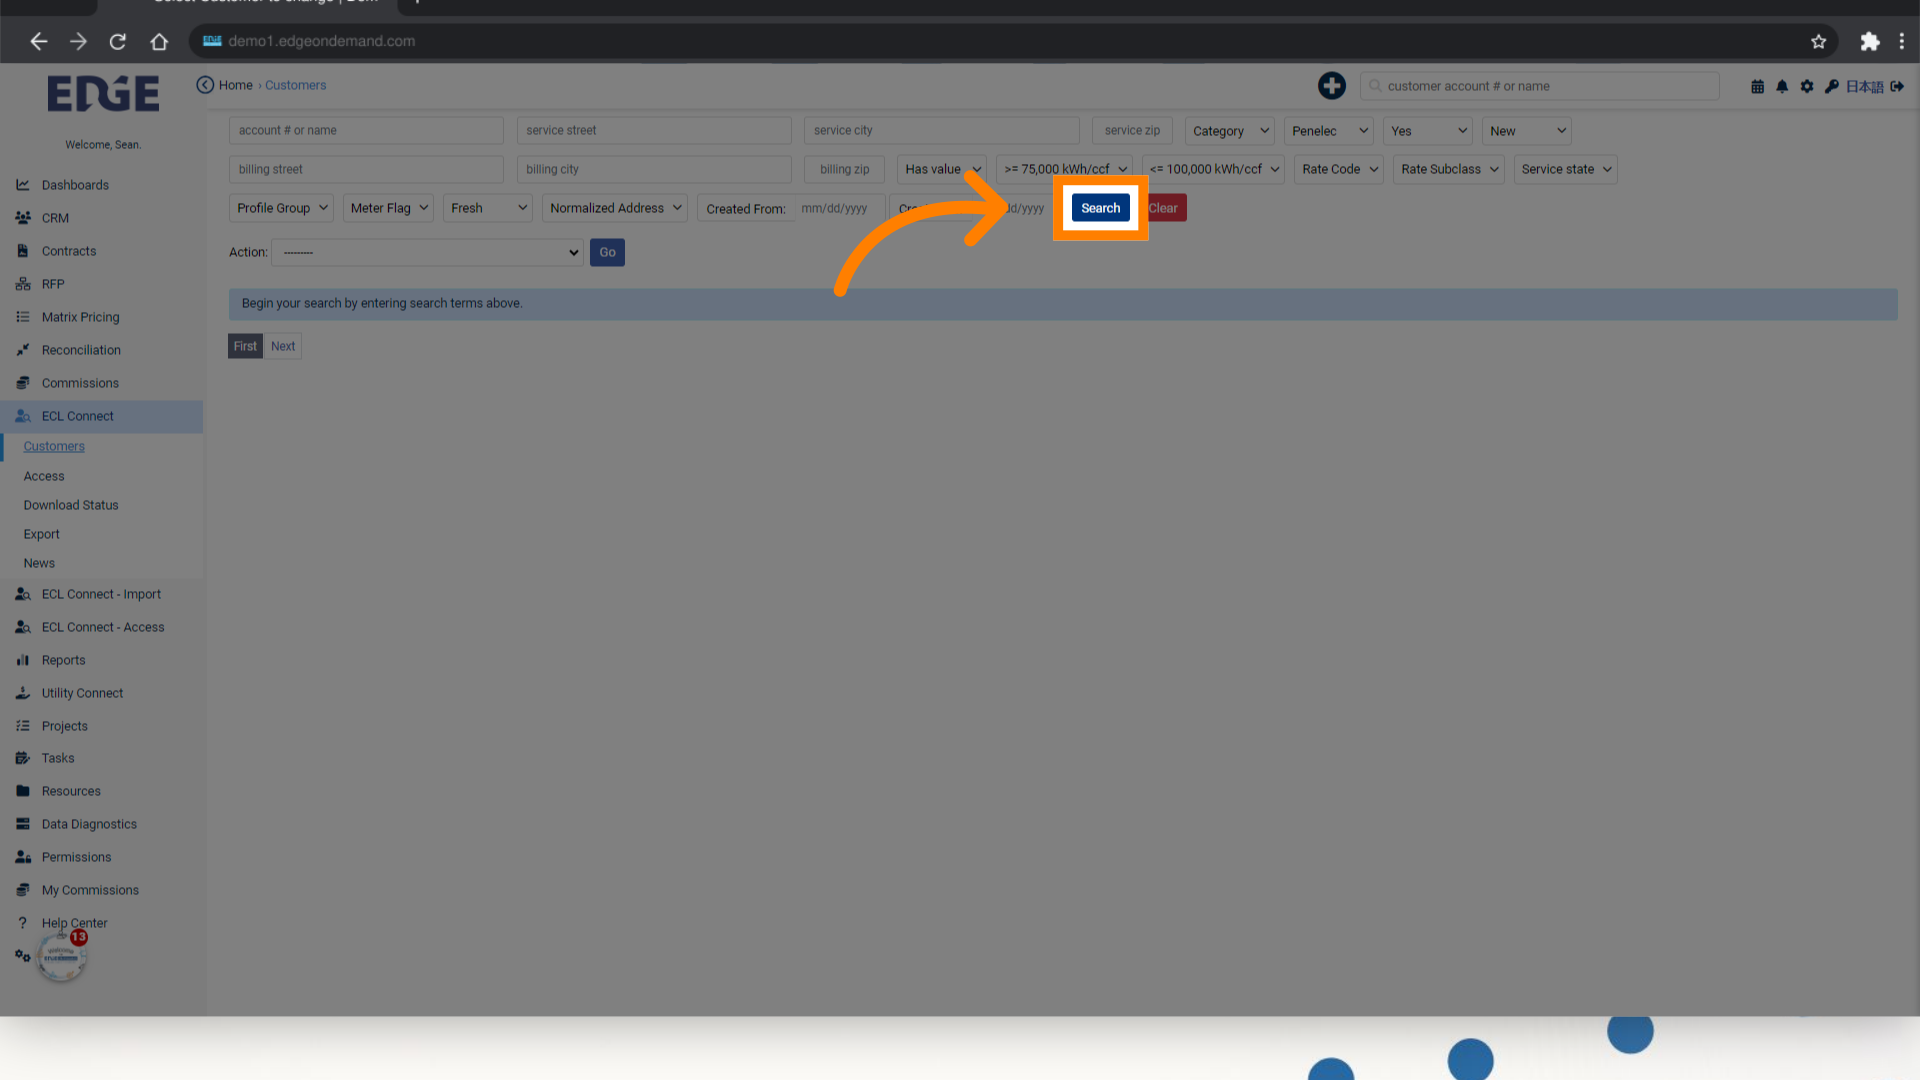
11. Click "Search"
Initiate the search process.
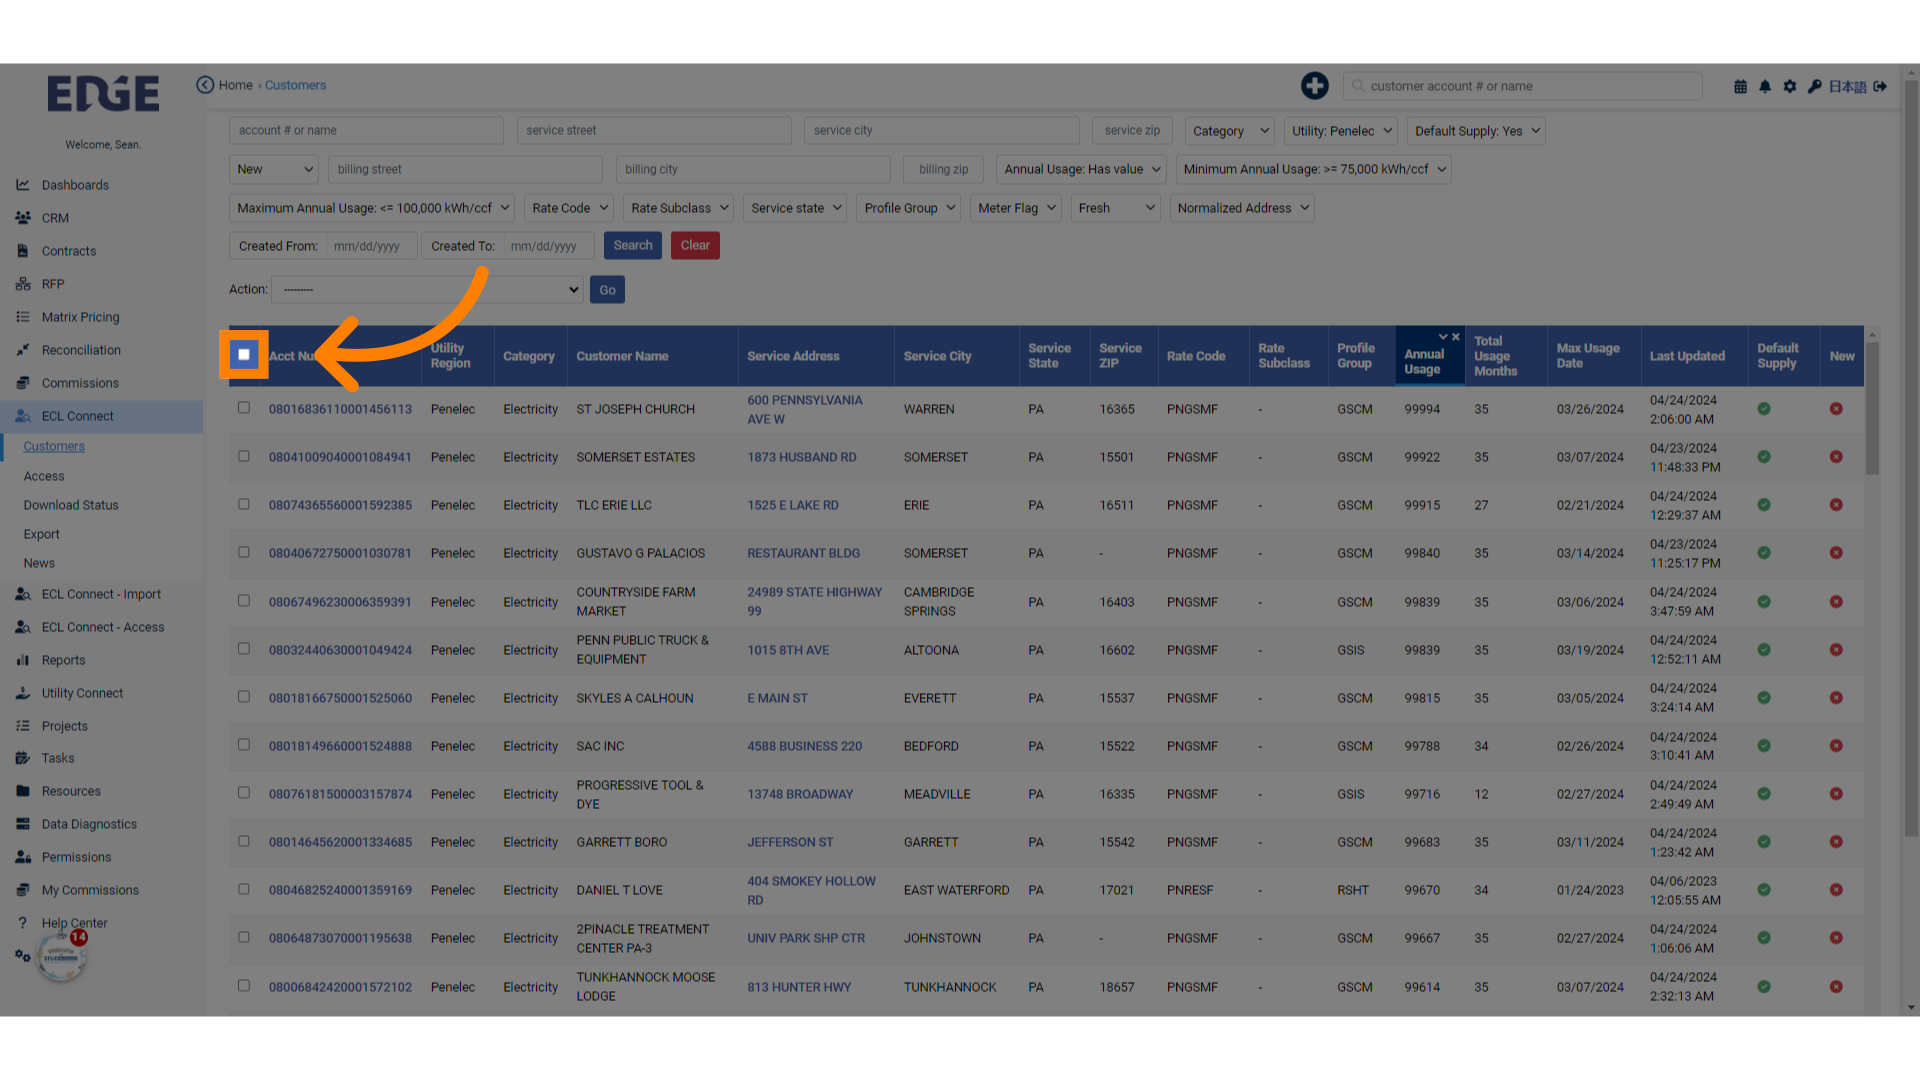
12. Select Records you want to export or...
Click on the "square of each record you want to download or click the square in the blue bar to select all records on the page.
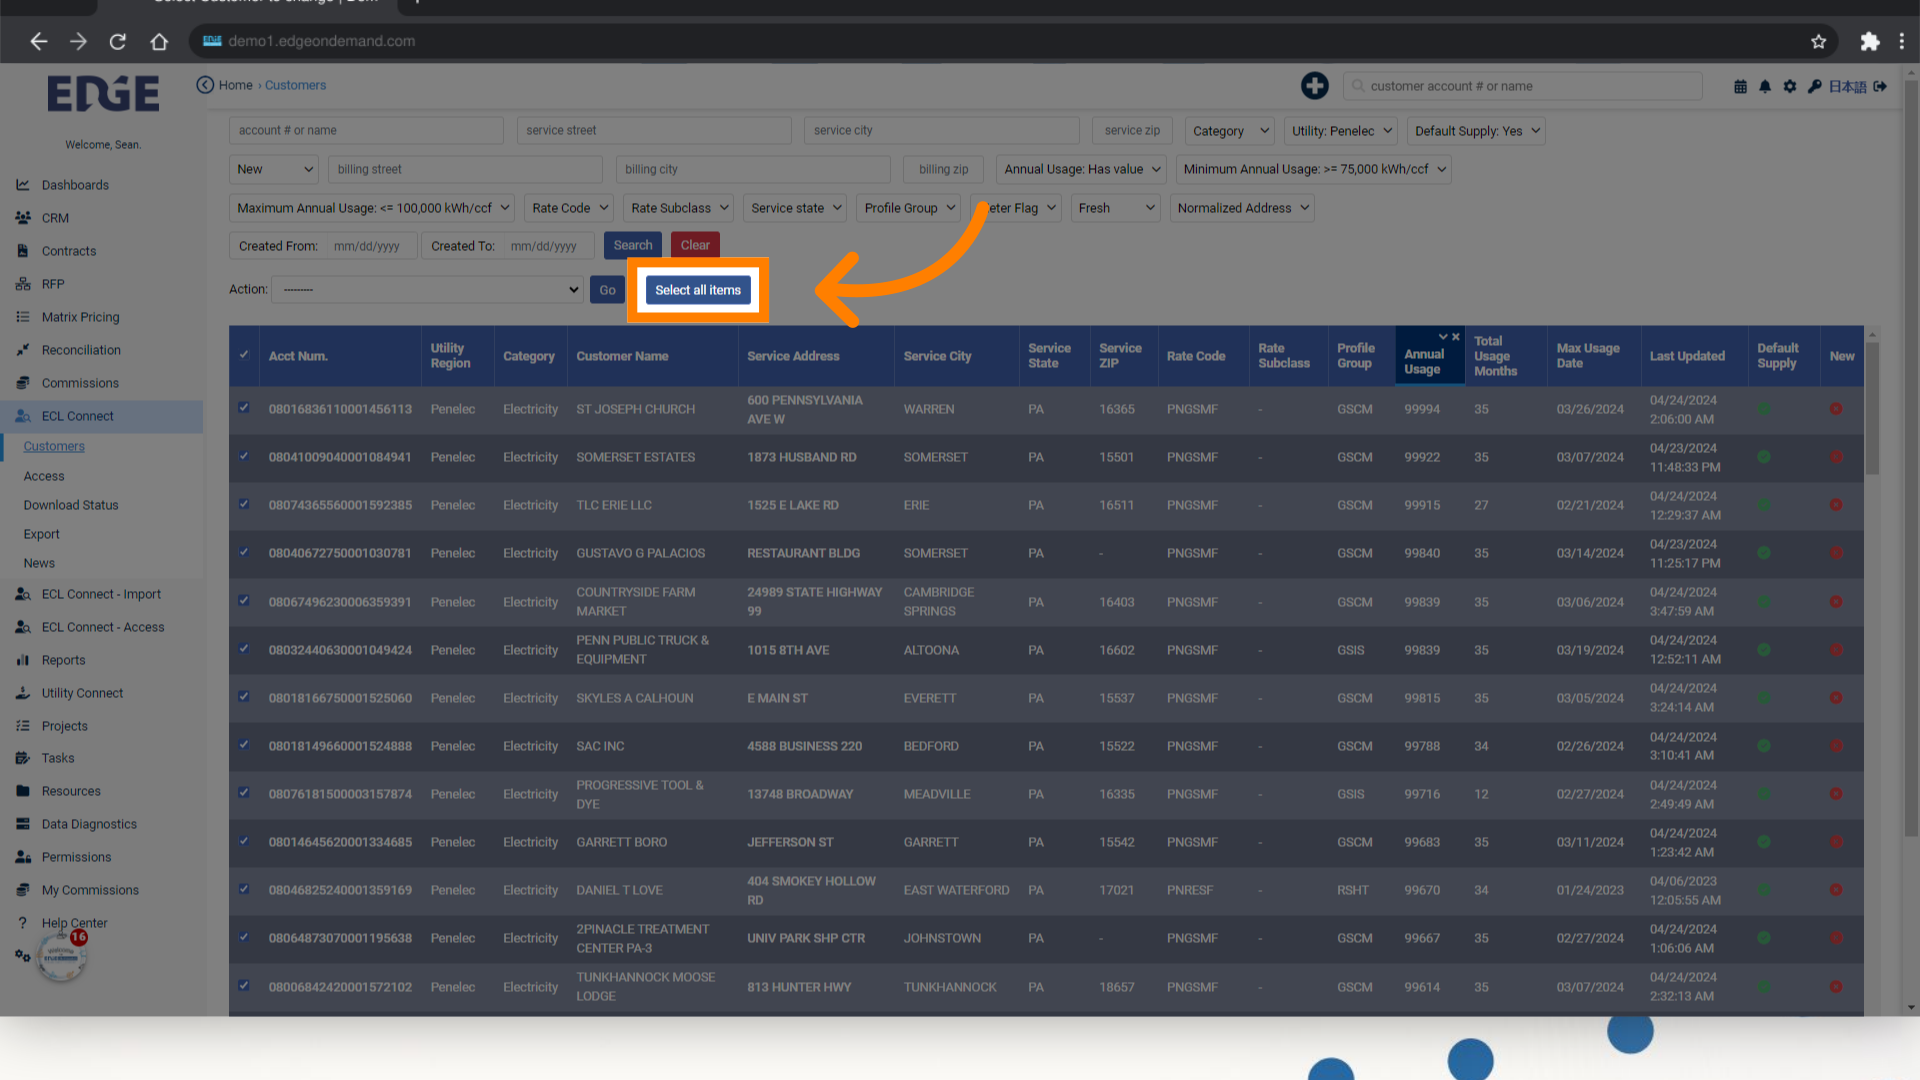
13. Click "Select all items"
Choose the option to "Select all items". This will select all items from multiple pages that match your selections.
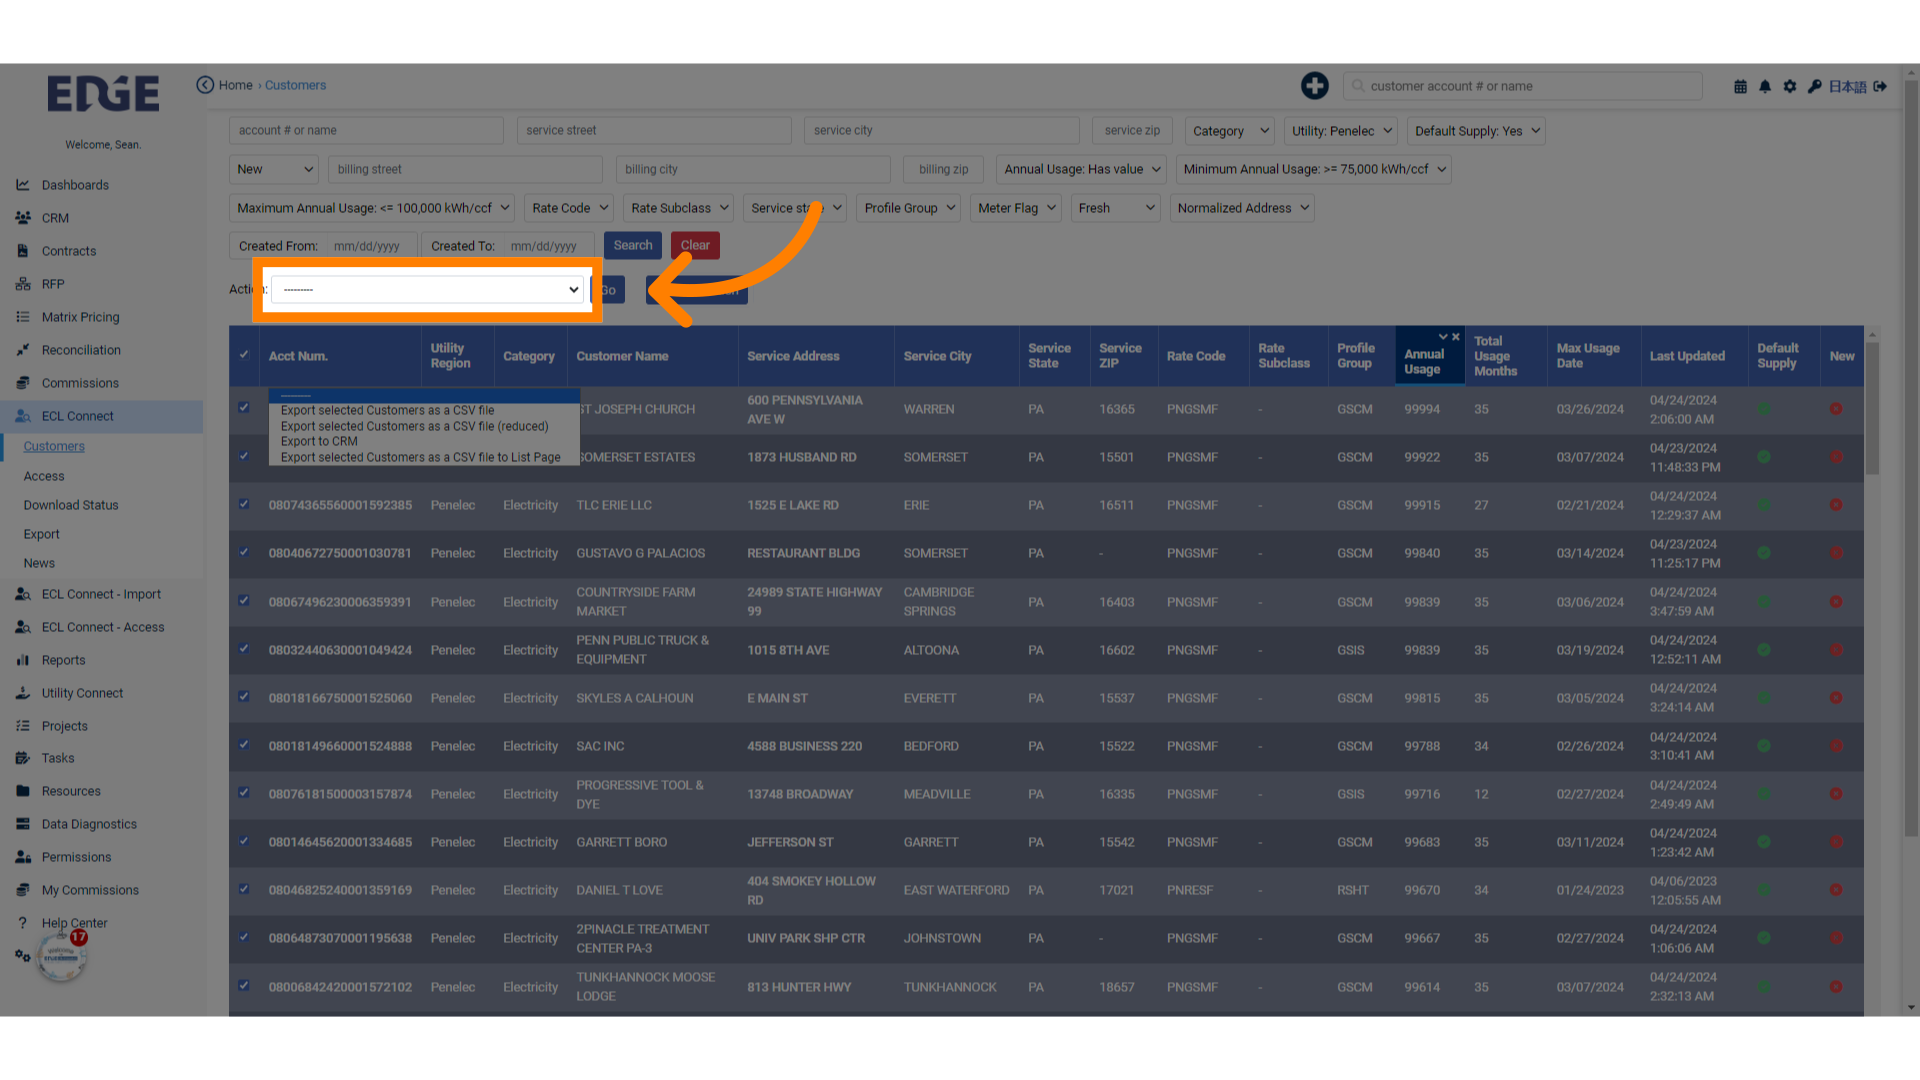
14. Click "--------- Export selected Customers as a CSV file Export selected Customers as a CSV file (reduced) Export to CRM Export selected Customers as a CSV file to List Page"
Select the desired export option.
15. Fill "--------- Export selected Customers as a CSV file Export selected Customers as a CSV file (reduced) Export to CRM Export selected Customers as a CSV file to List Page"
Provide the necessary details for the export.
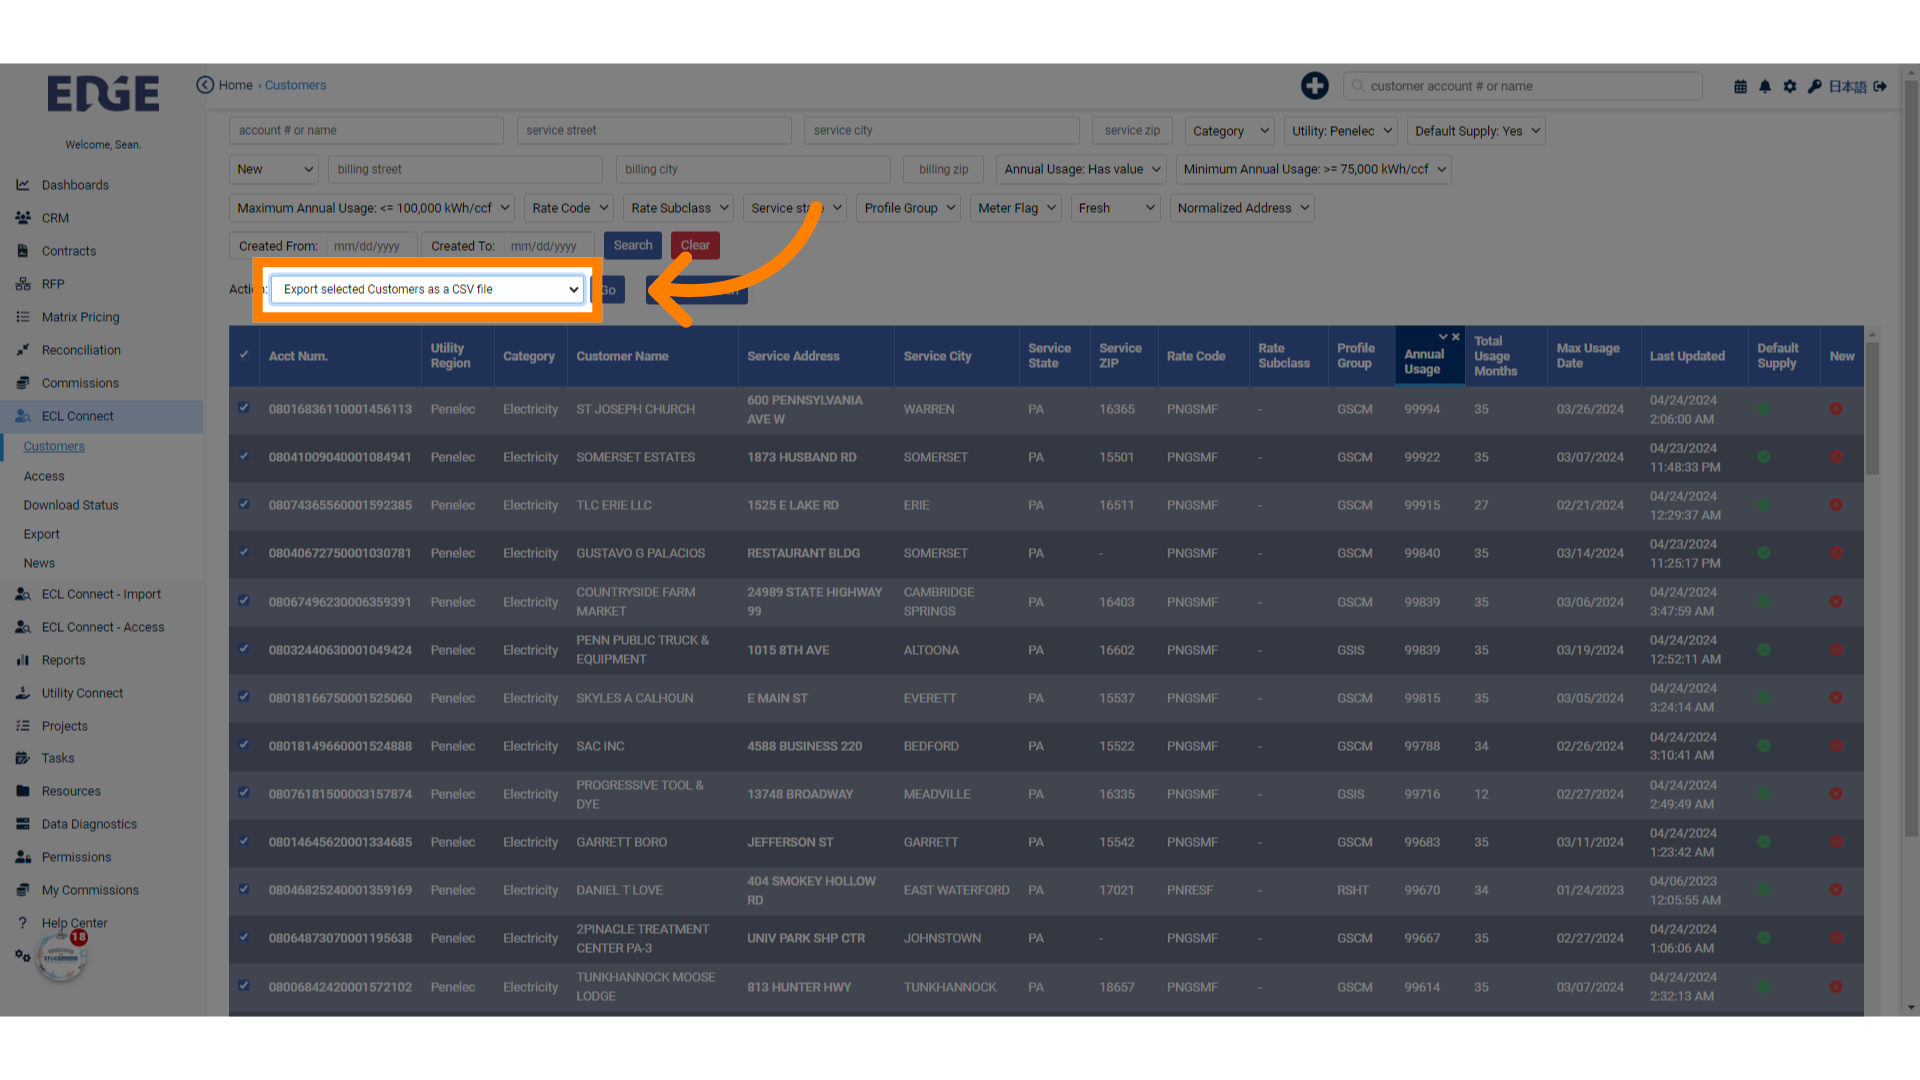
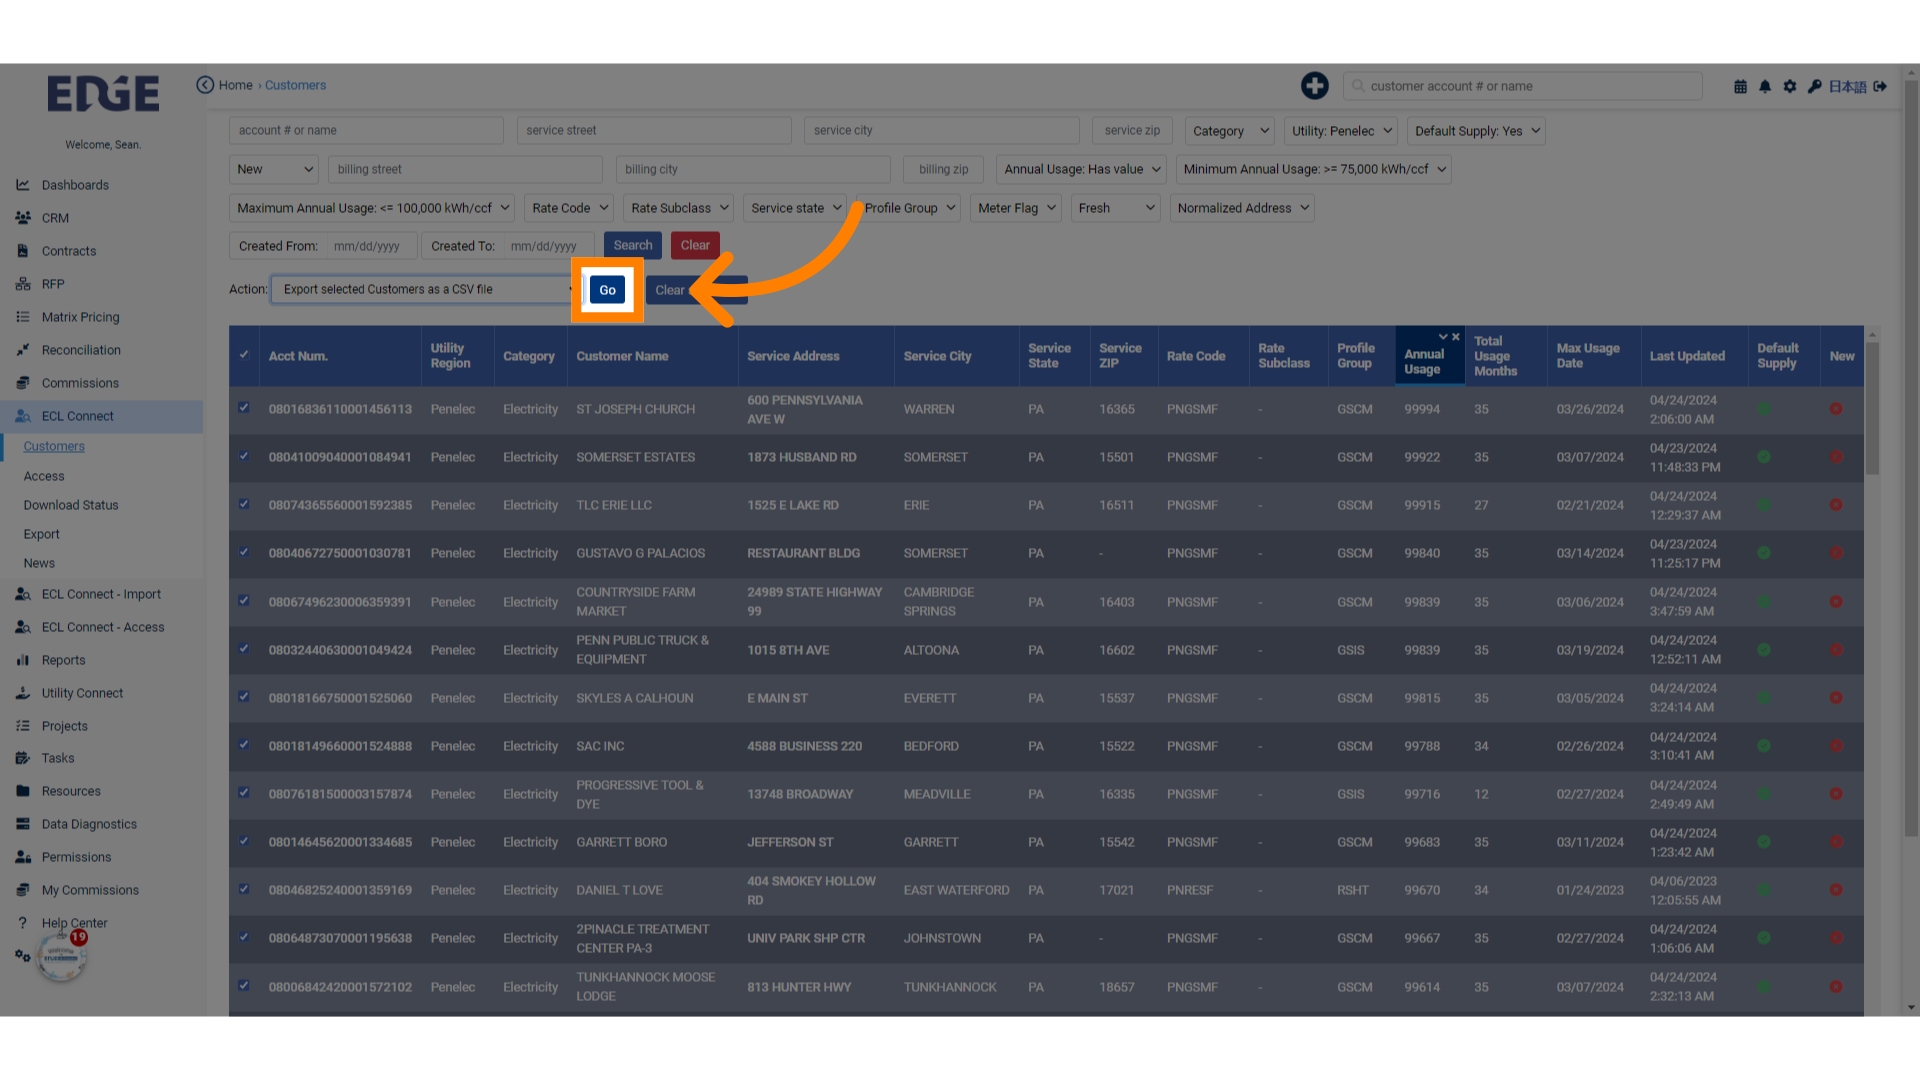
16. Click "G0"
Select option "Go" from the menu. This will download or email the file to you depending on the size of the file.
This guide covered the process of using ECL in Edgeondemand to export files effectively. From selecting criteria to exporting files as CSV, each step was detailed to ensure a seamless experience.
Was this article helpful?
That’s Great!
Thank you for your feedback
Sorry! We couldn't be helpful
Thank you for your feedback
Feedback sent
We appreciate your effort and will try to fix the article