CRM Basics: How to create a contract
This guide provides a step by step walkthrough of how to create a contract.
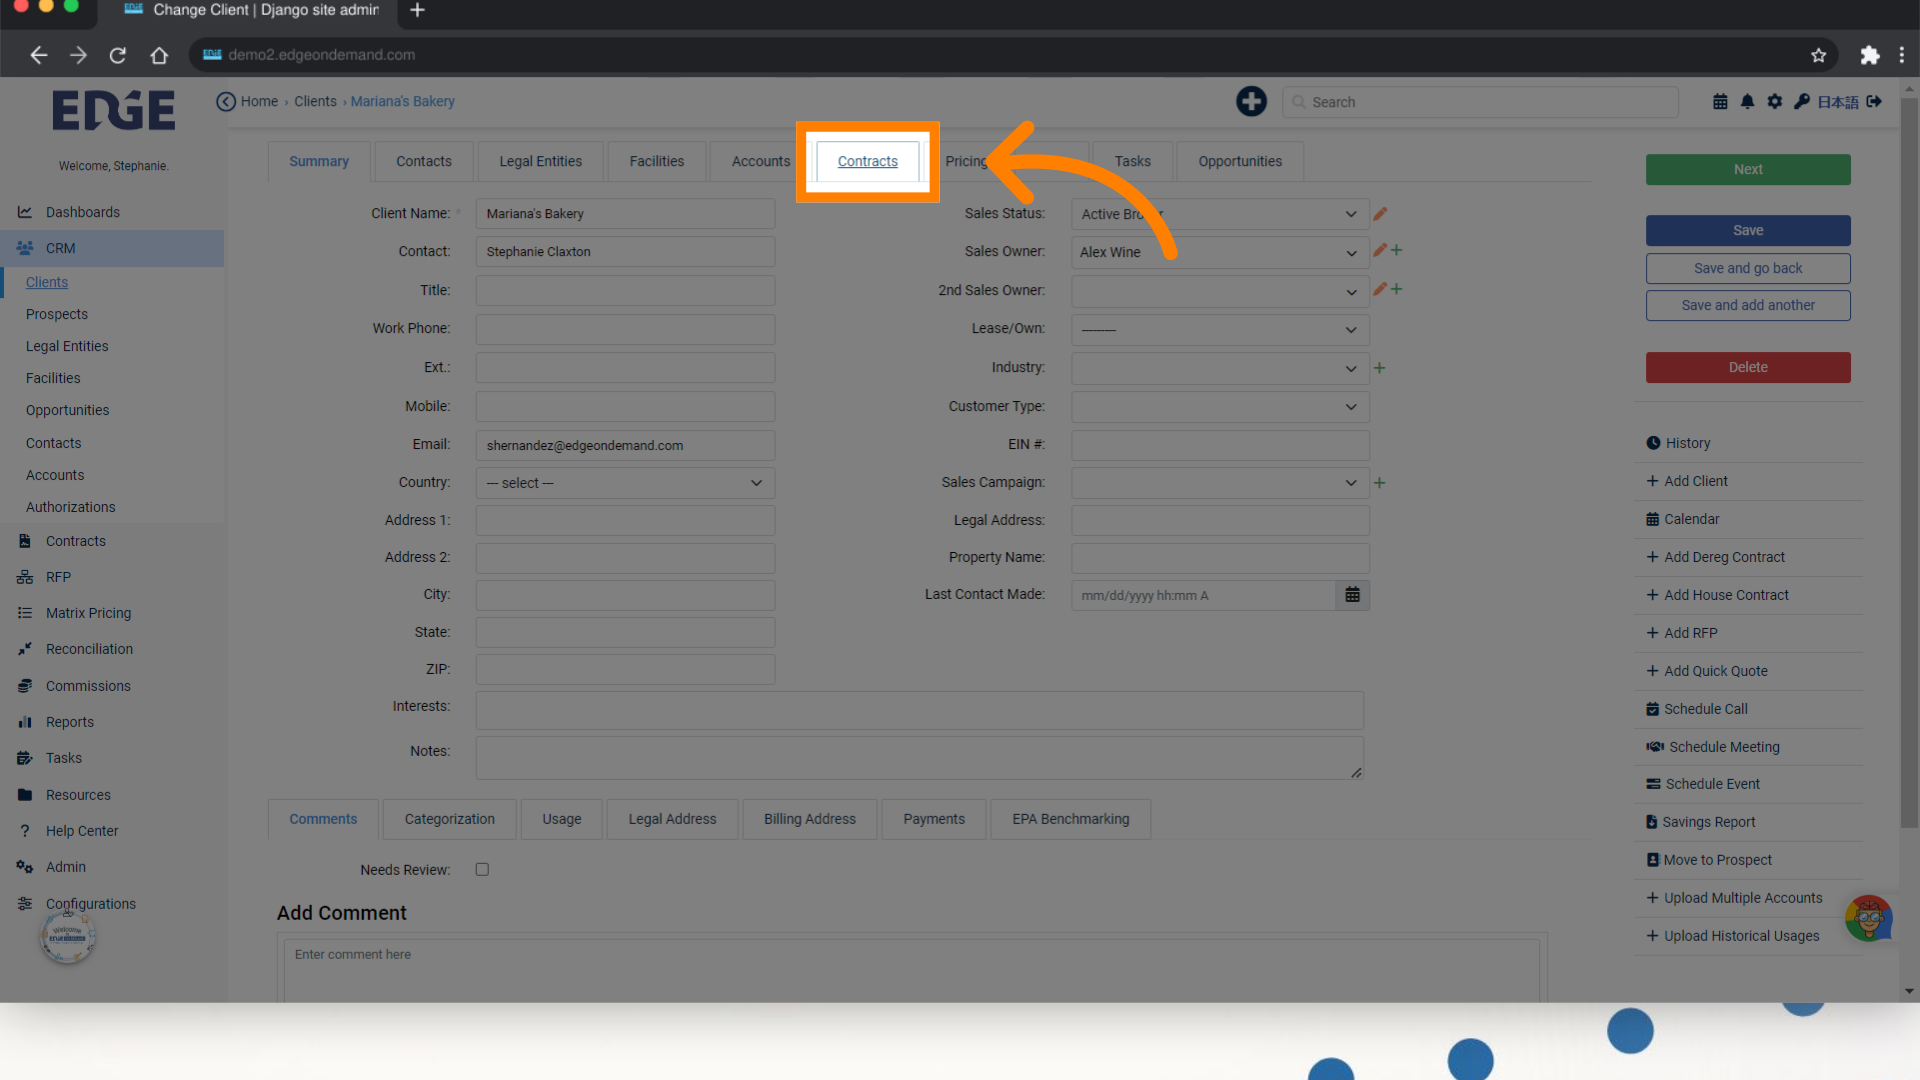
1. In an opened Client, navigate to the "Contracts" tab
Click on "Contracts"
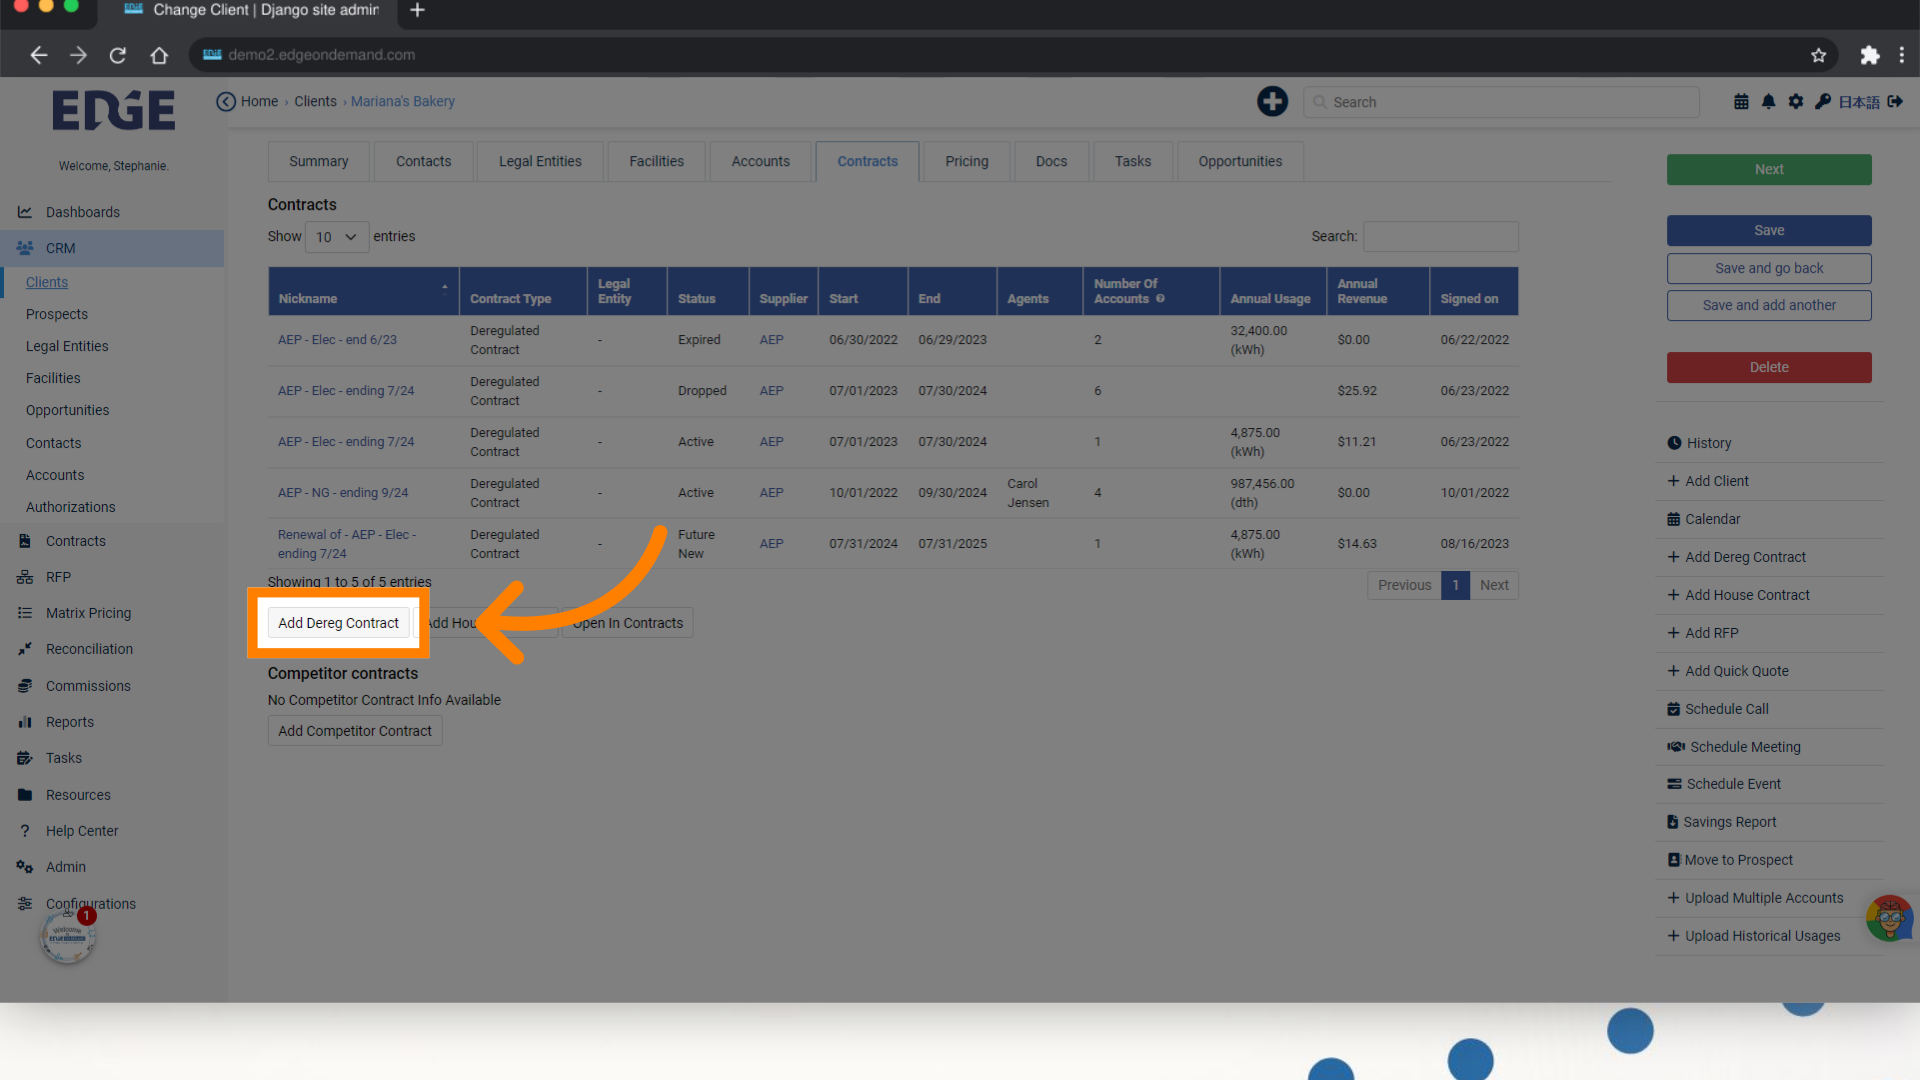
2. Click "Add Contract"
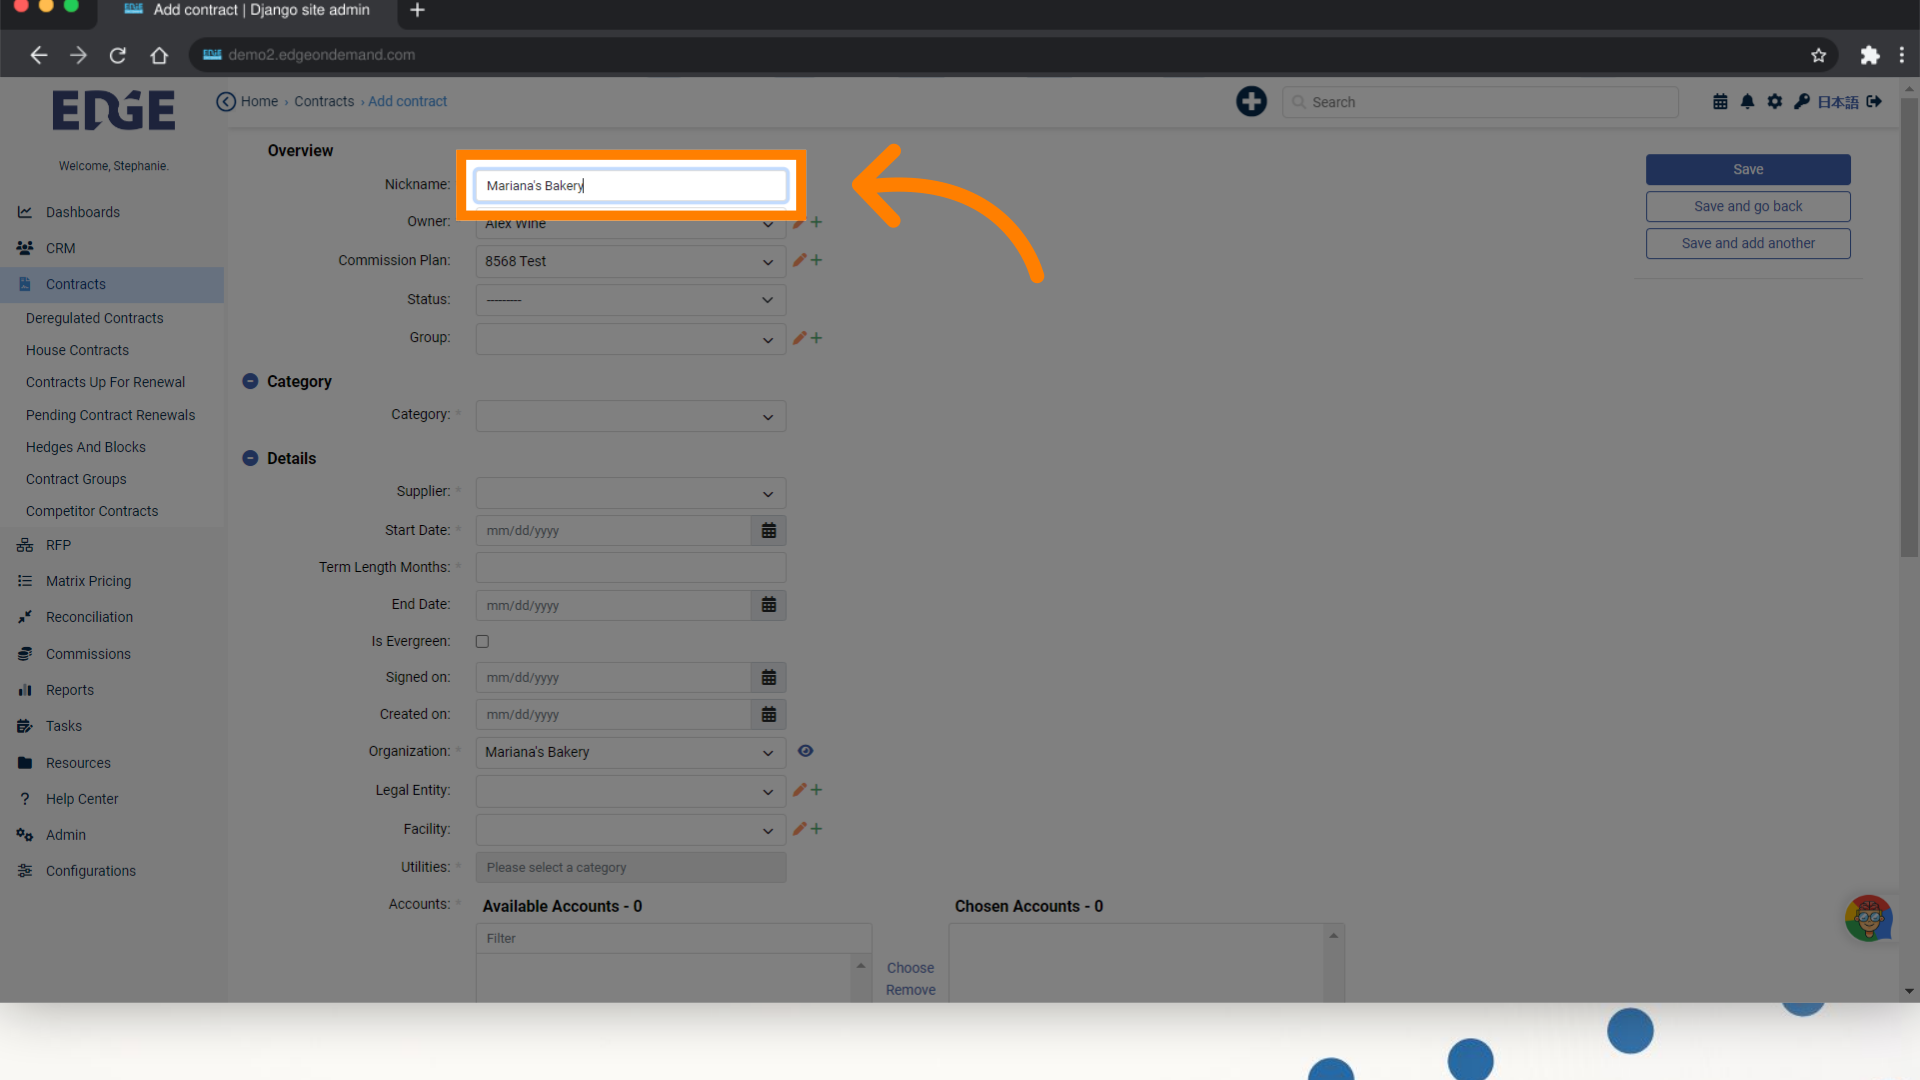
3. Enter a Nickname for your contract
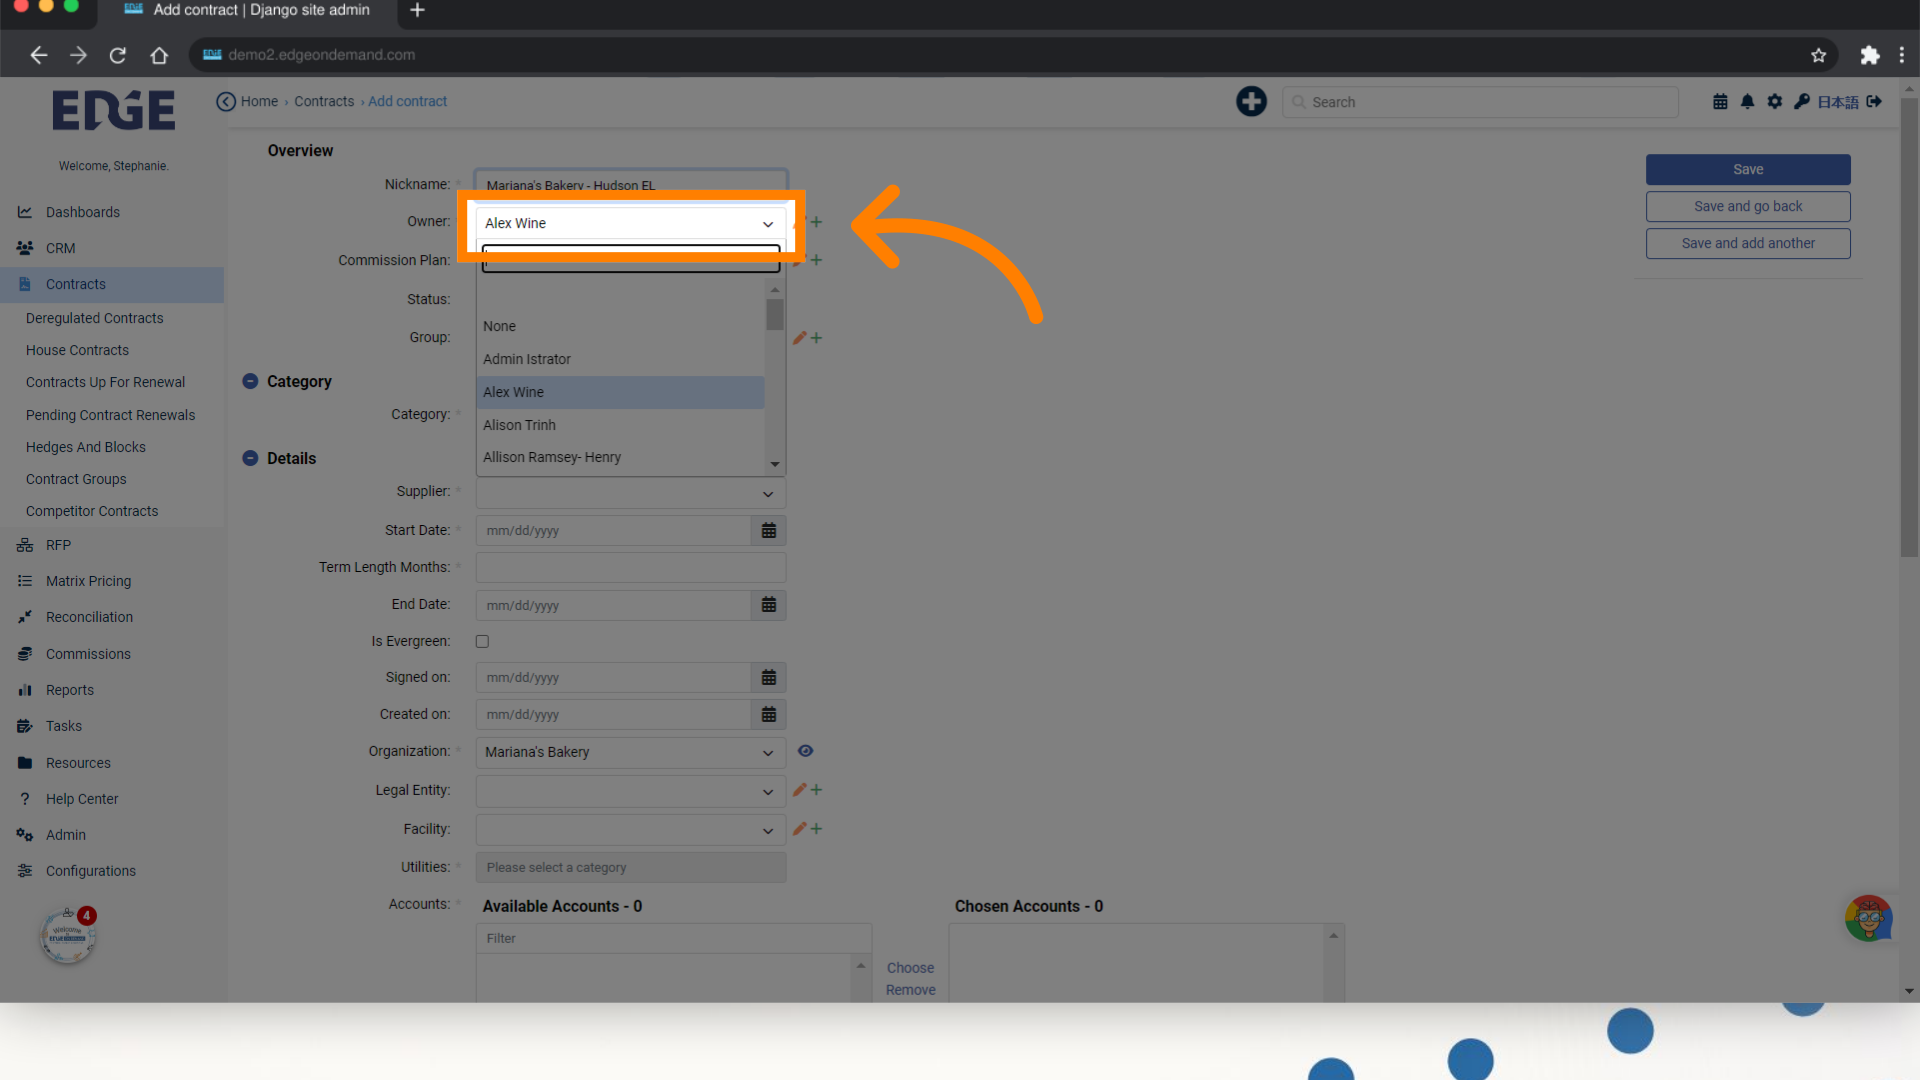
4. Select a contract Owner
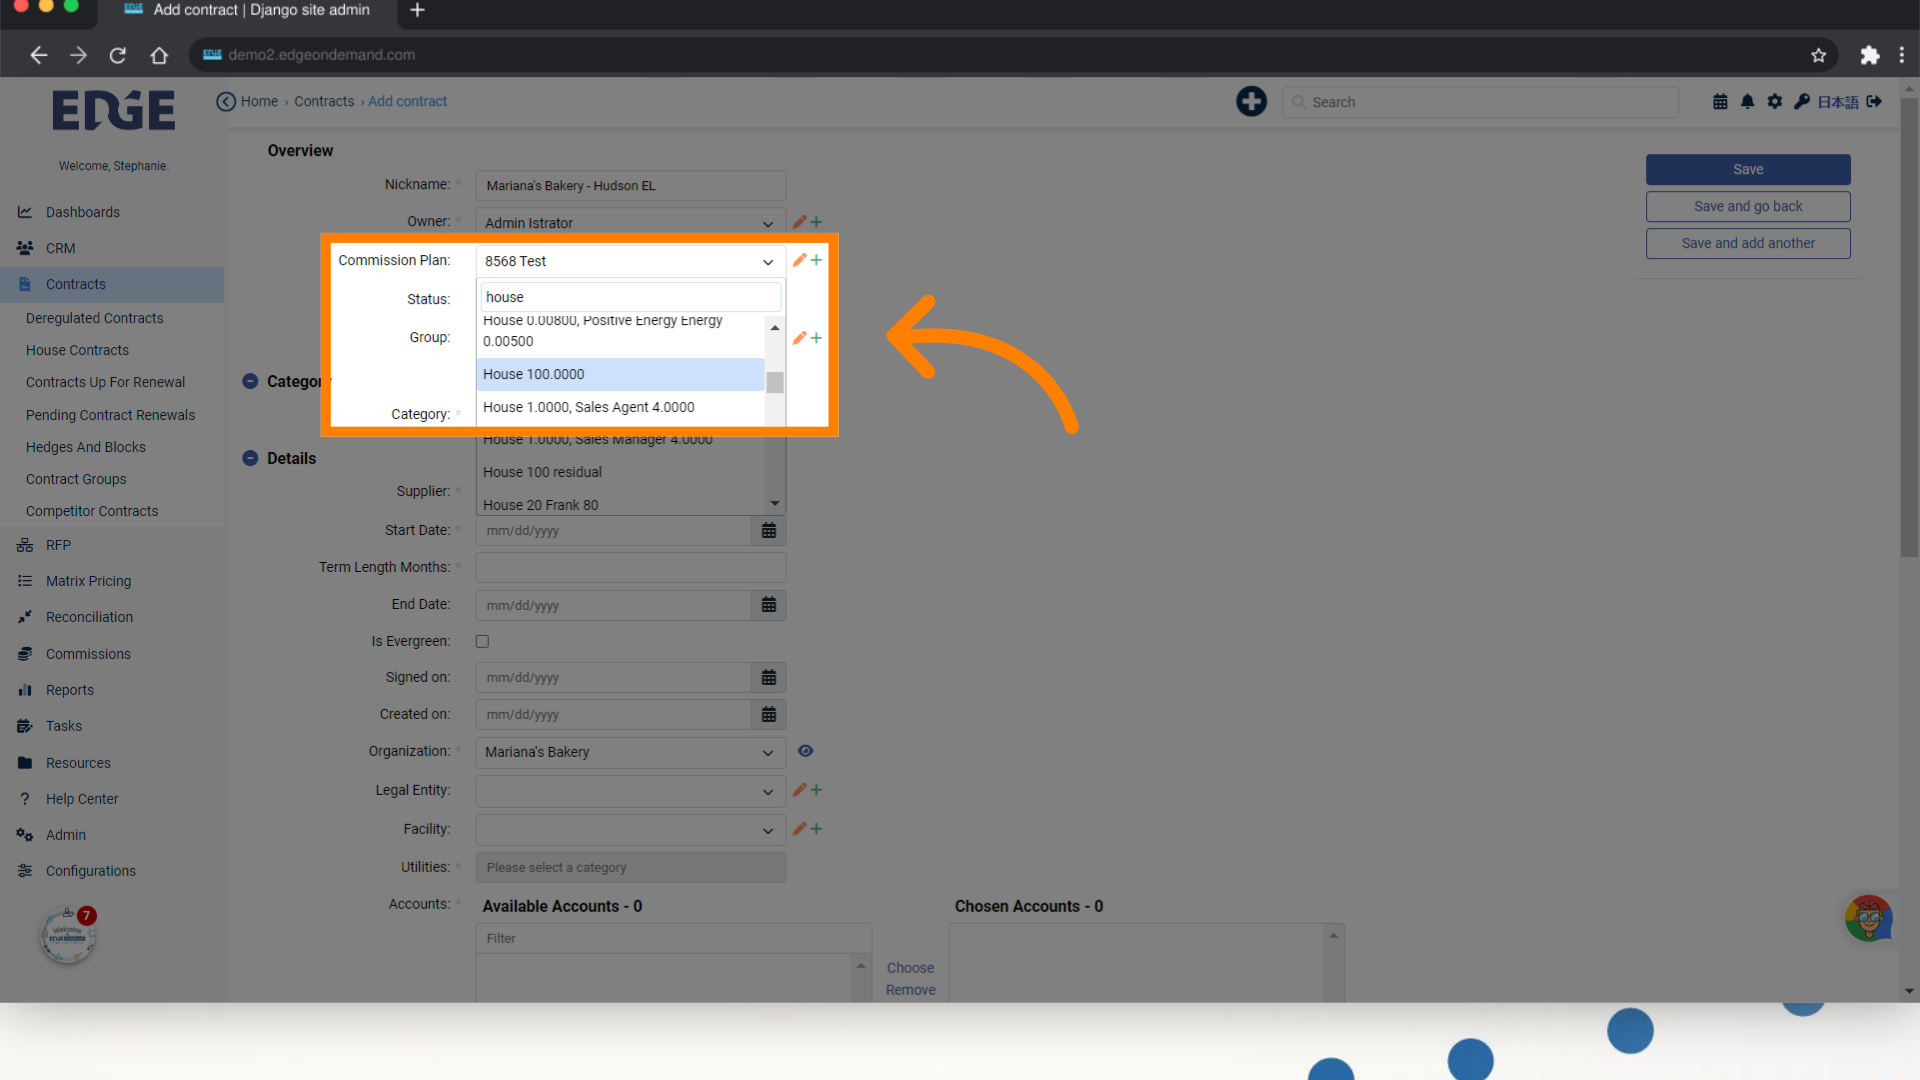
5. Select a Commission Plan
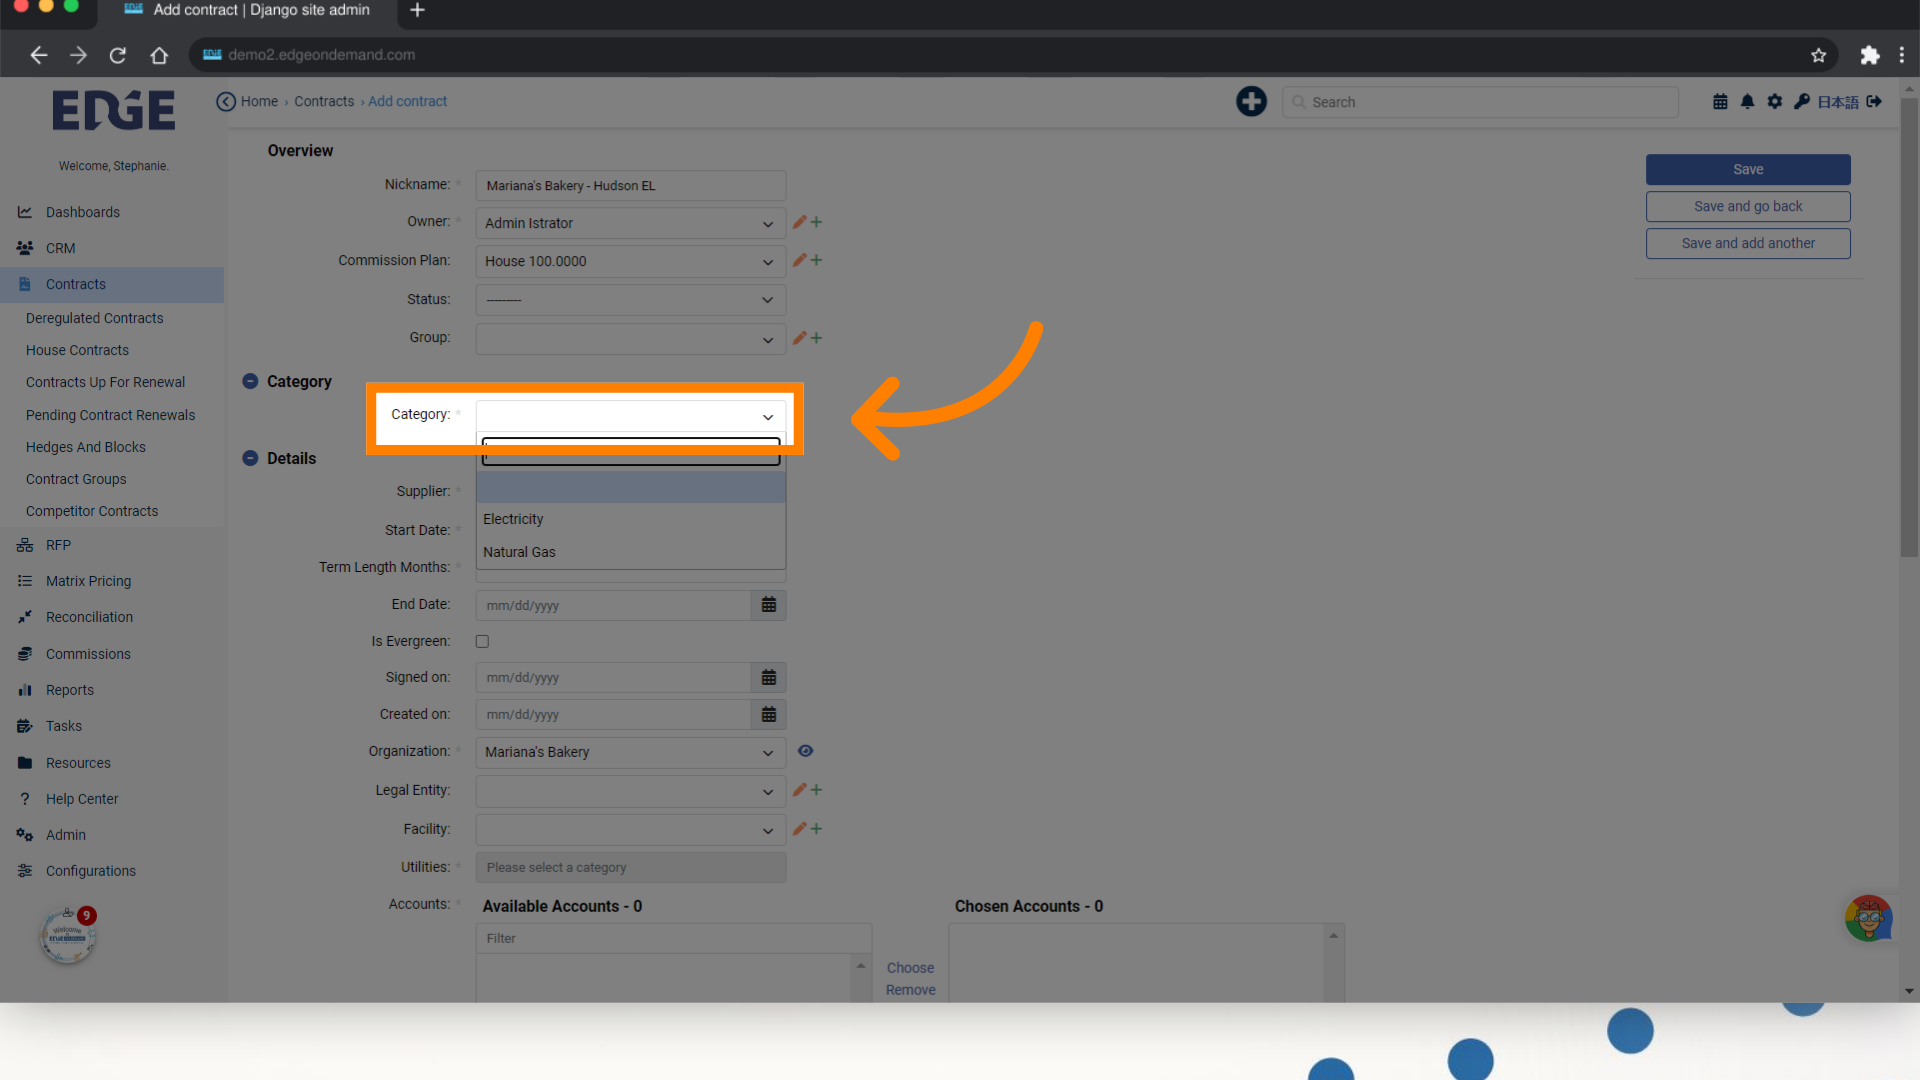
6. Choose the commodity of the contract
Click here
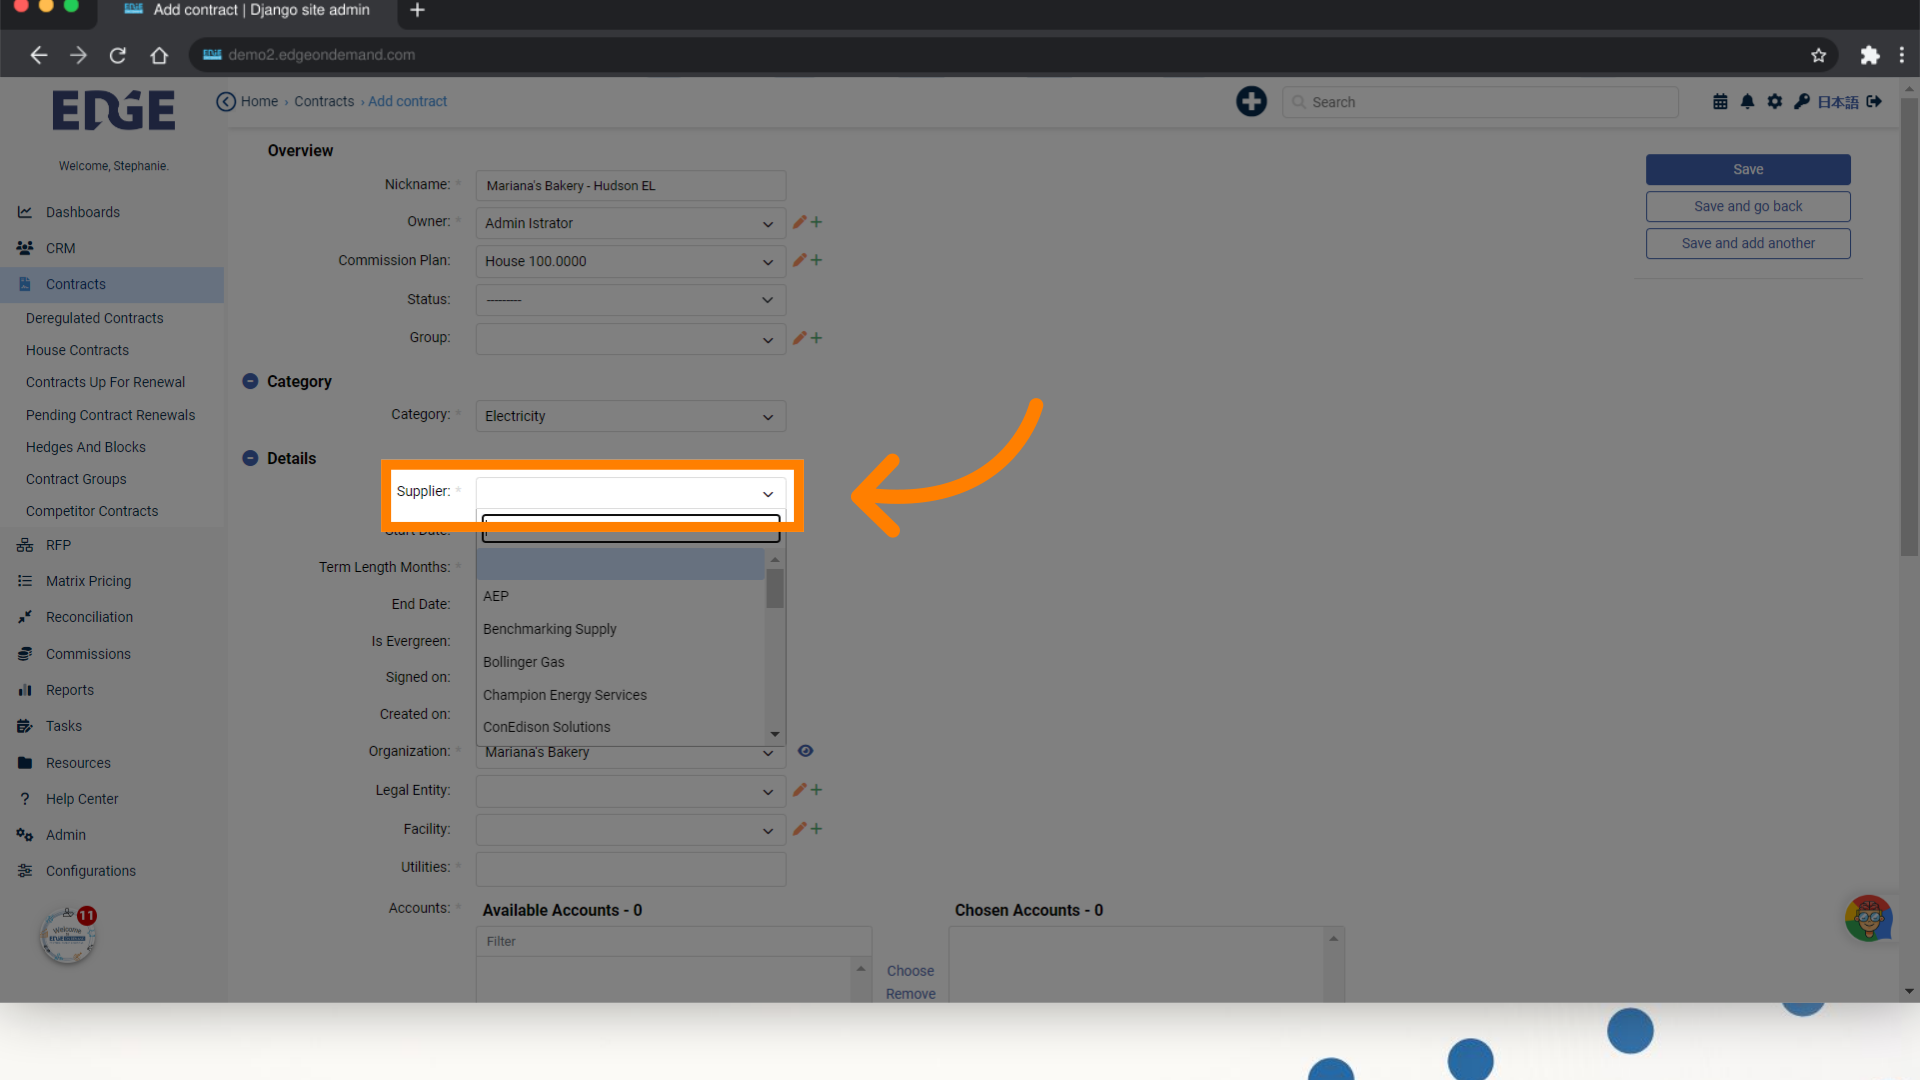
7. Search and select the contracted Supplier
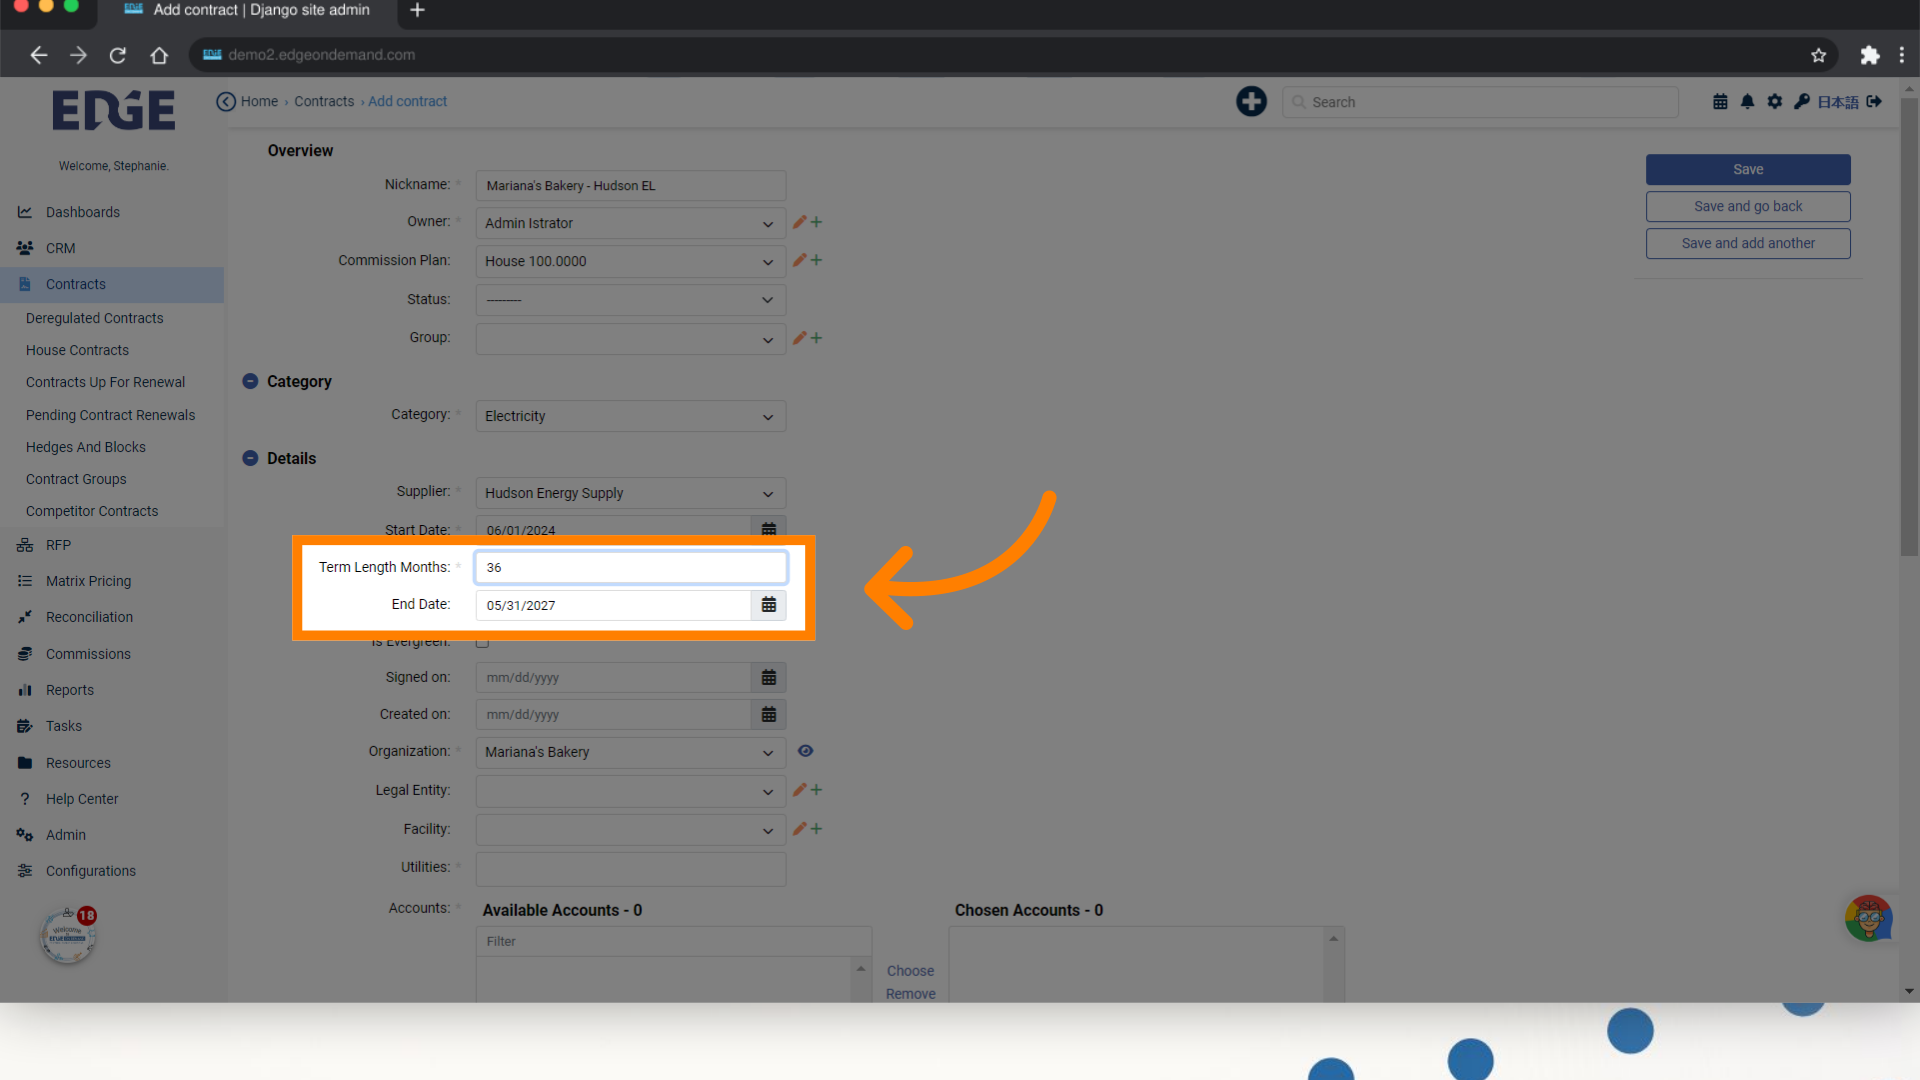
8. Select contract Start Date and input the term length to auto-populate the End Date
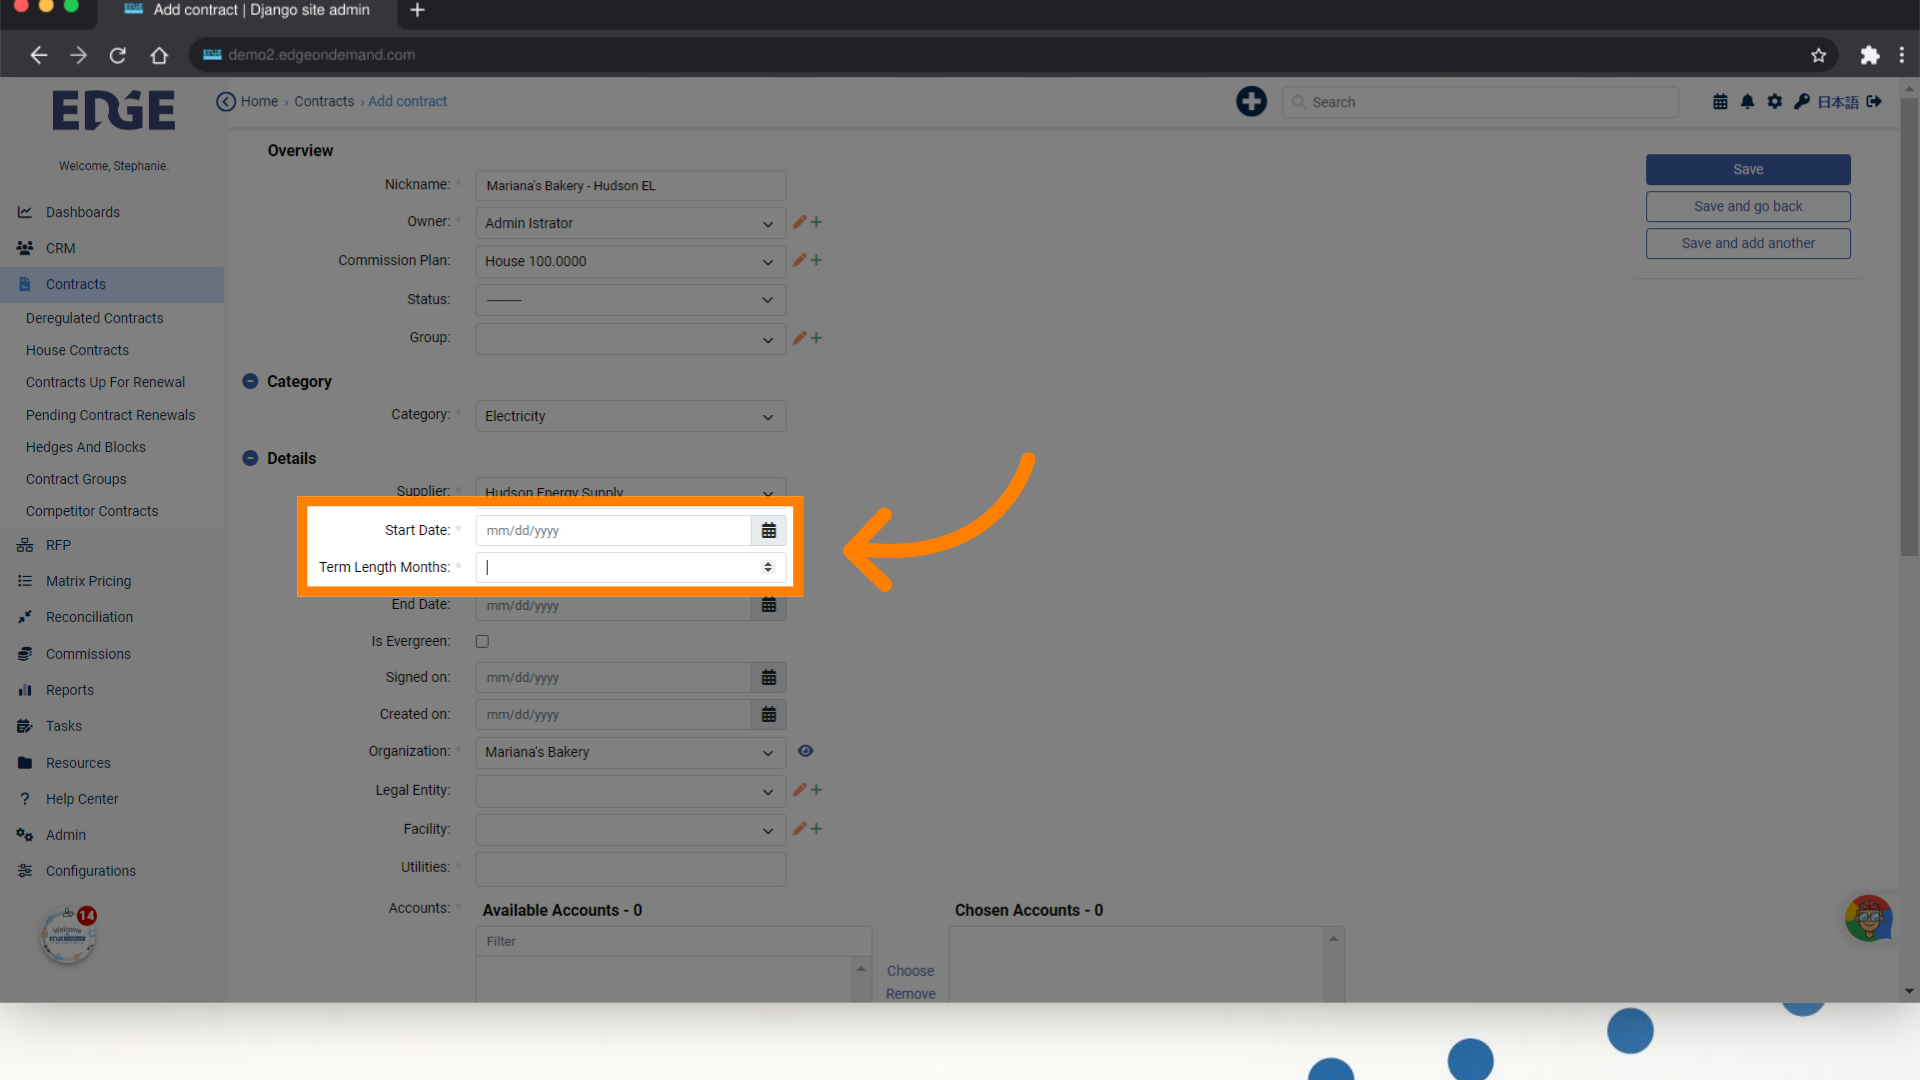
9. See that it auto-populates End Date
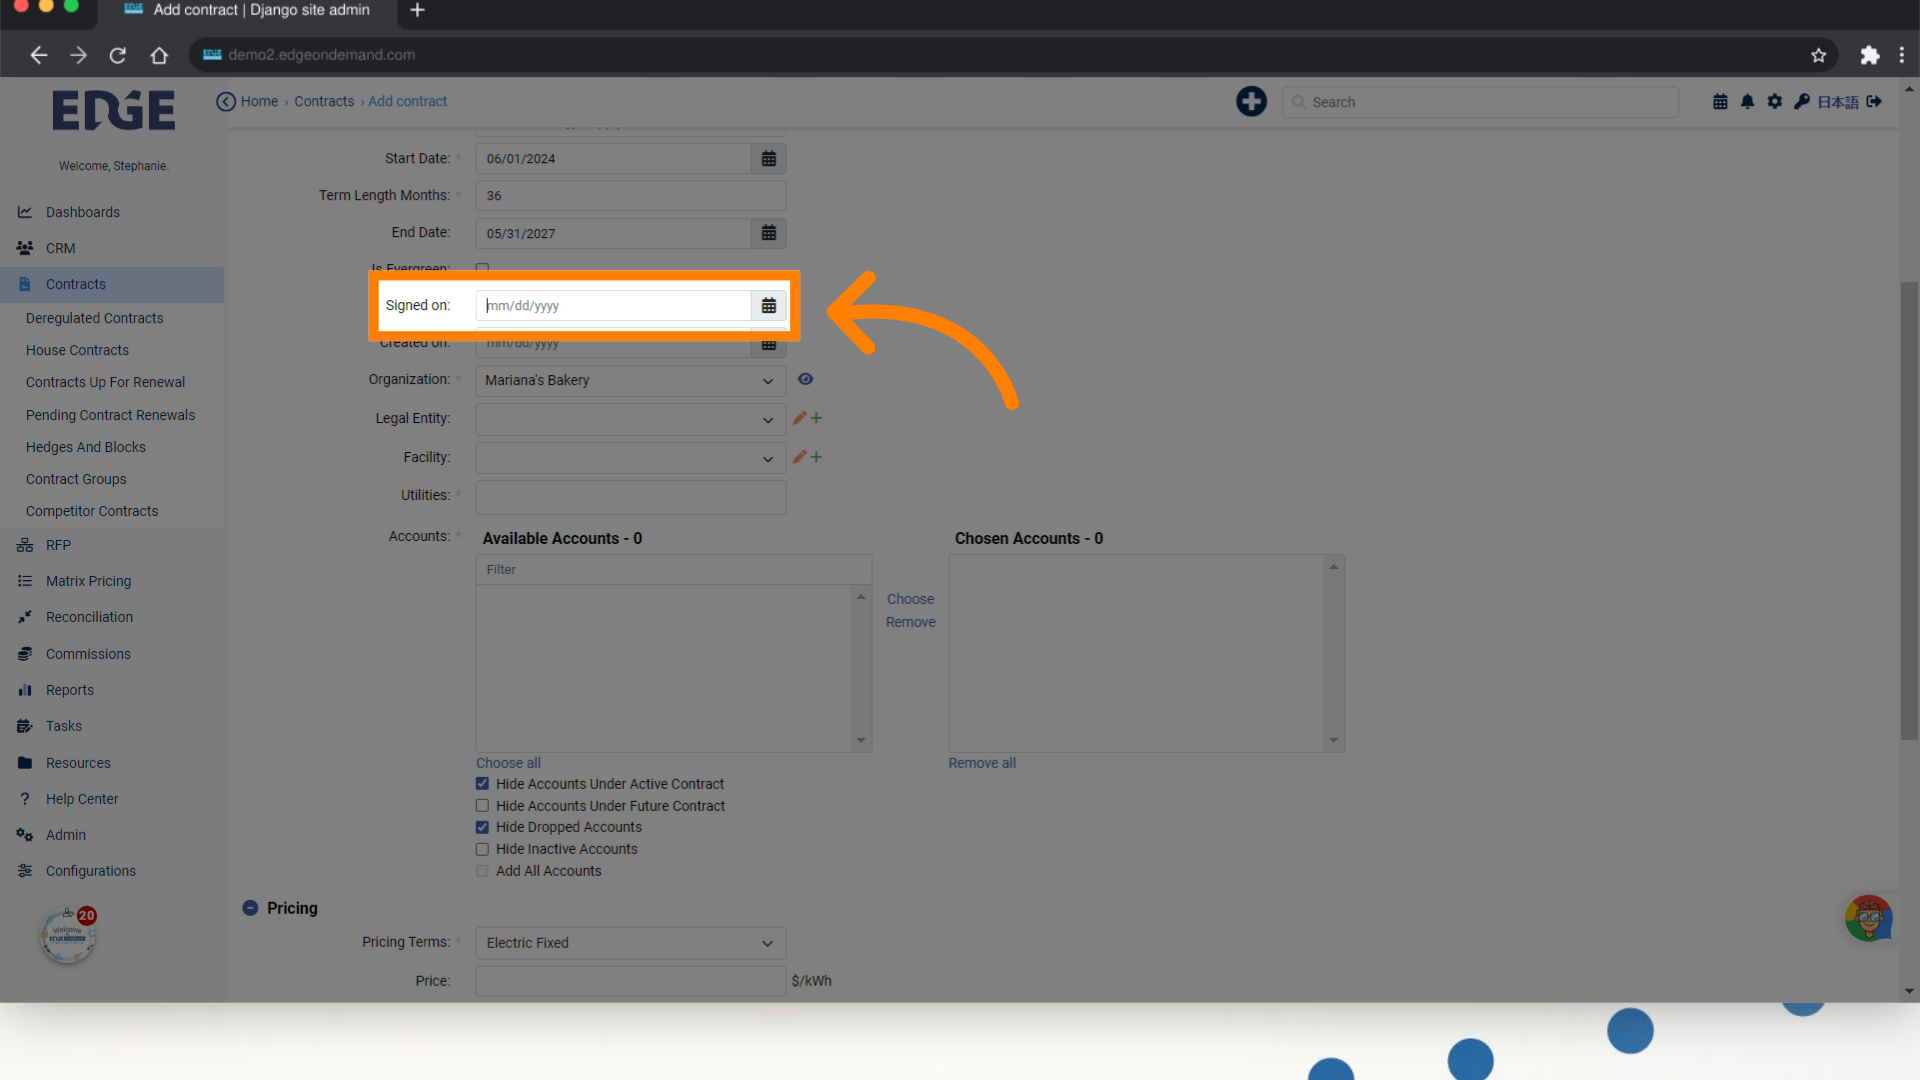
10. Input a Signed On date, otherwise the Status of the contract will display "Pending"
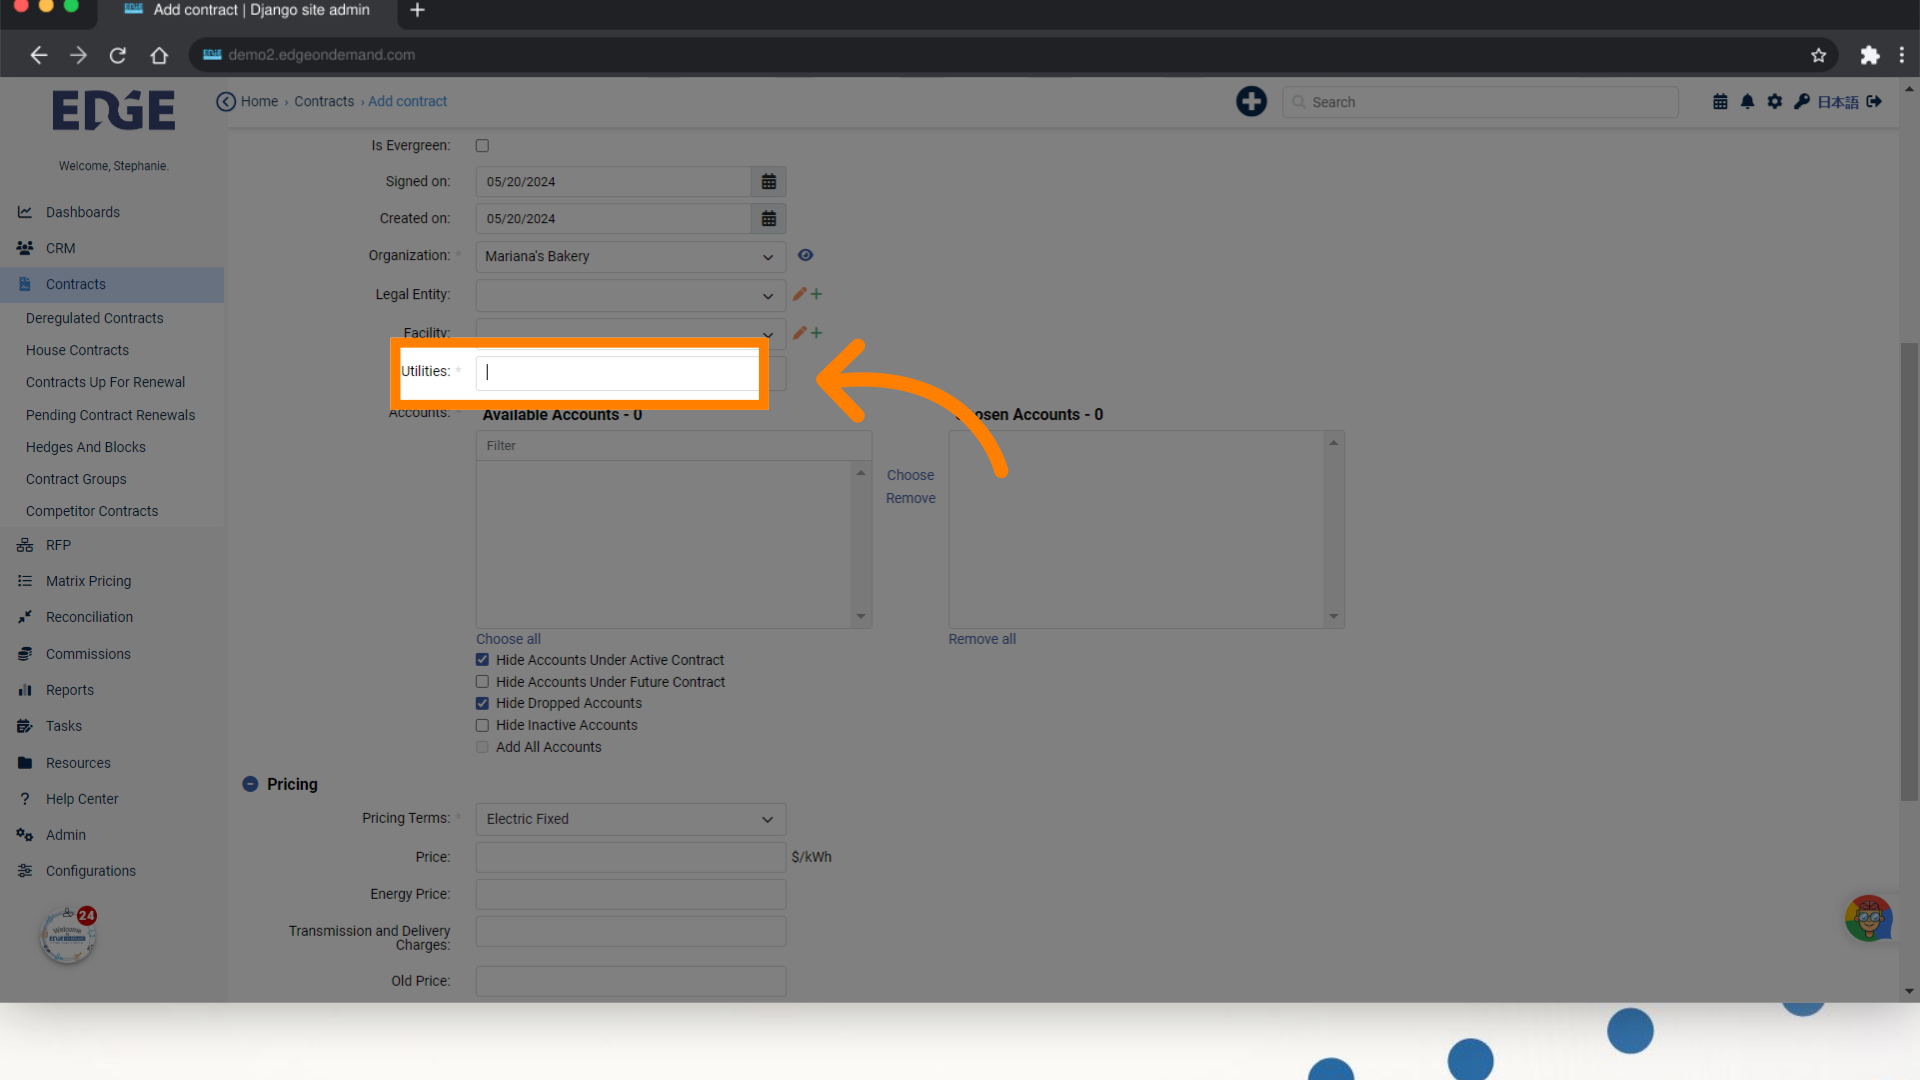
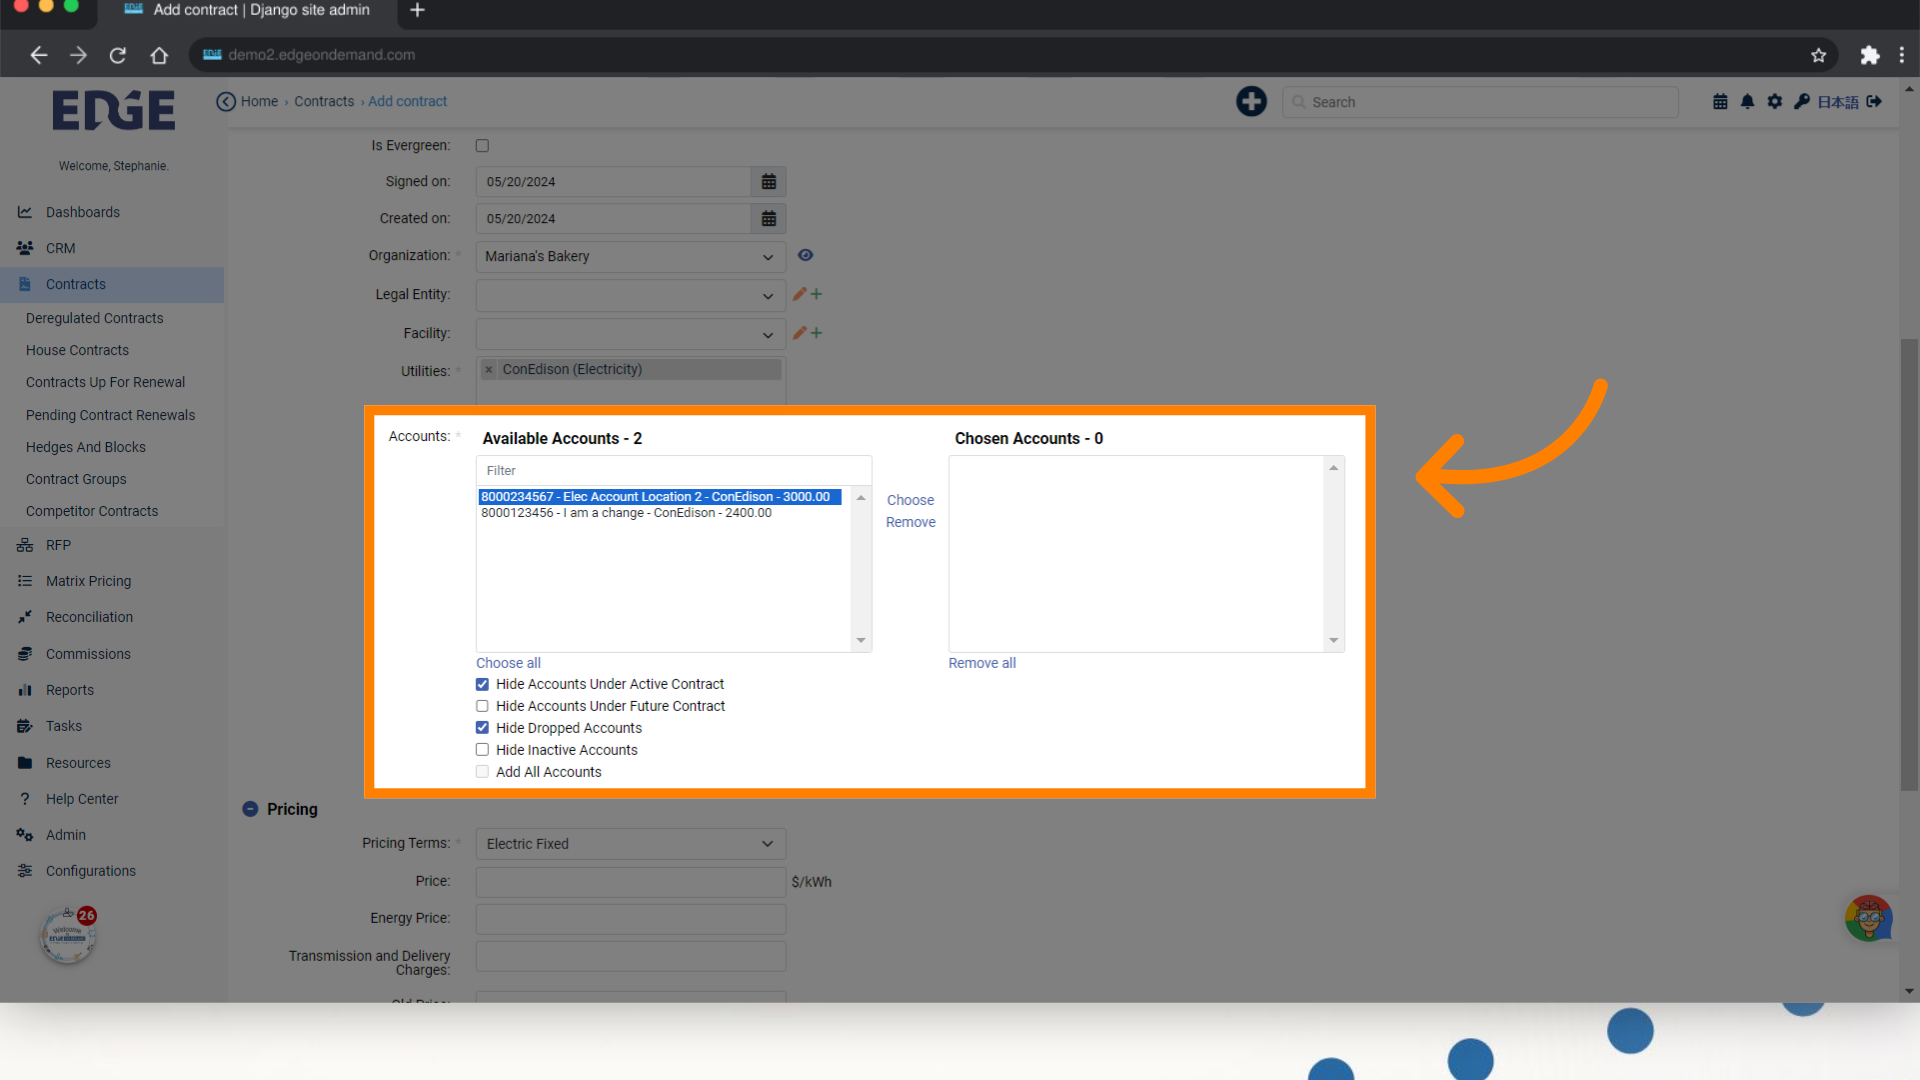
11. Search and select the Utility of the Accounts you want to add into the contract
12. Available accounts will populate in the left box. Make your selections and click "Choose" to add to contract
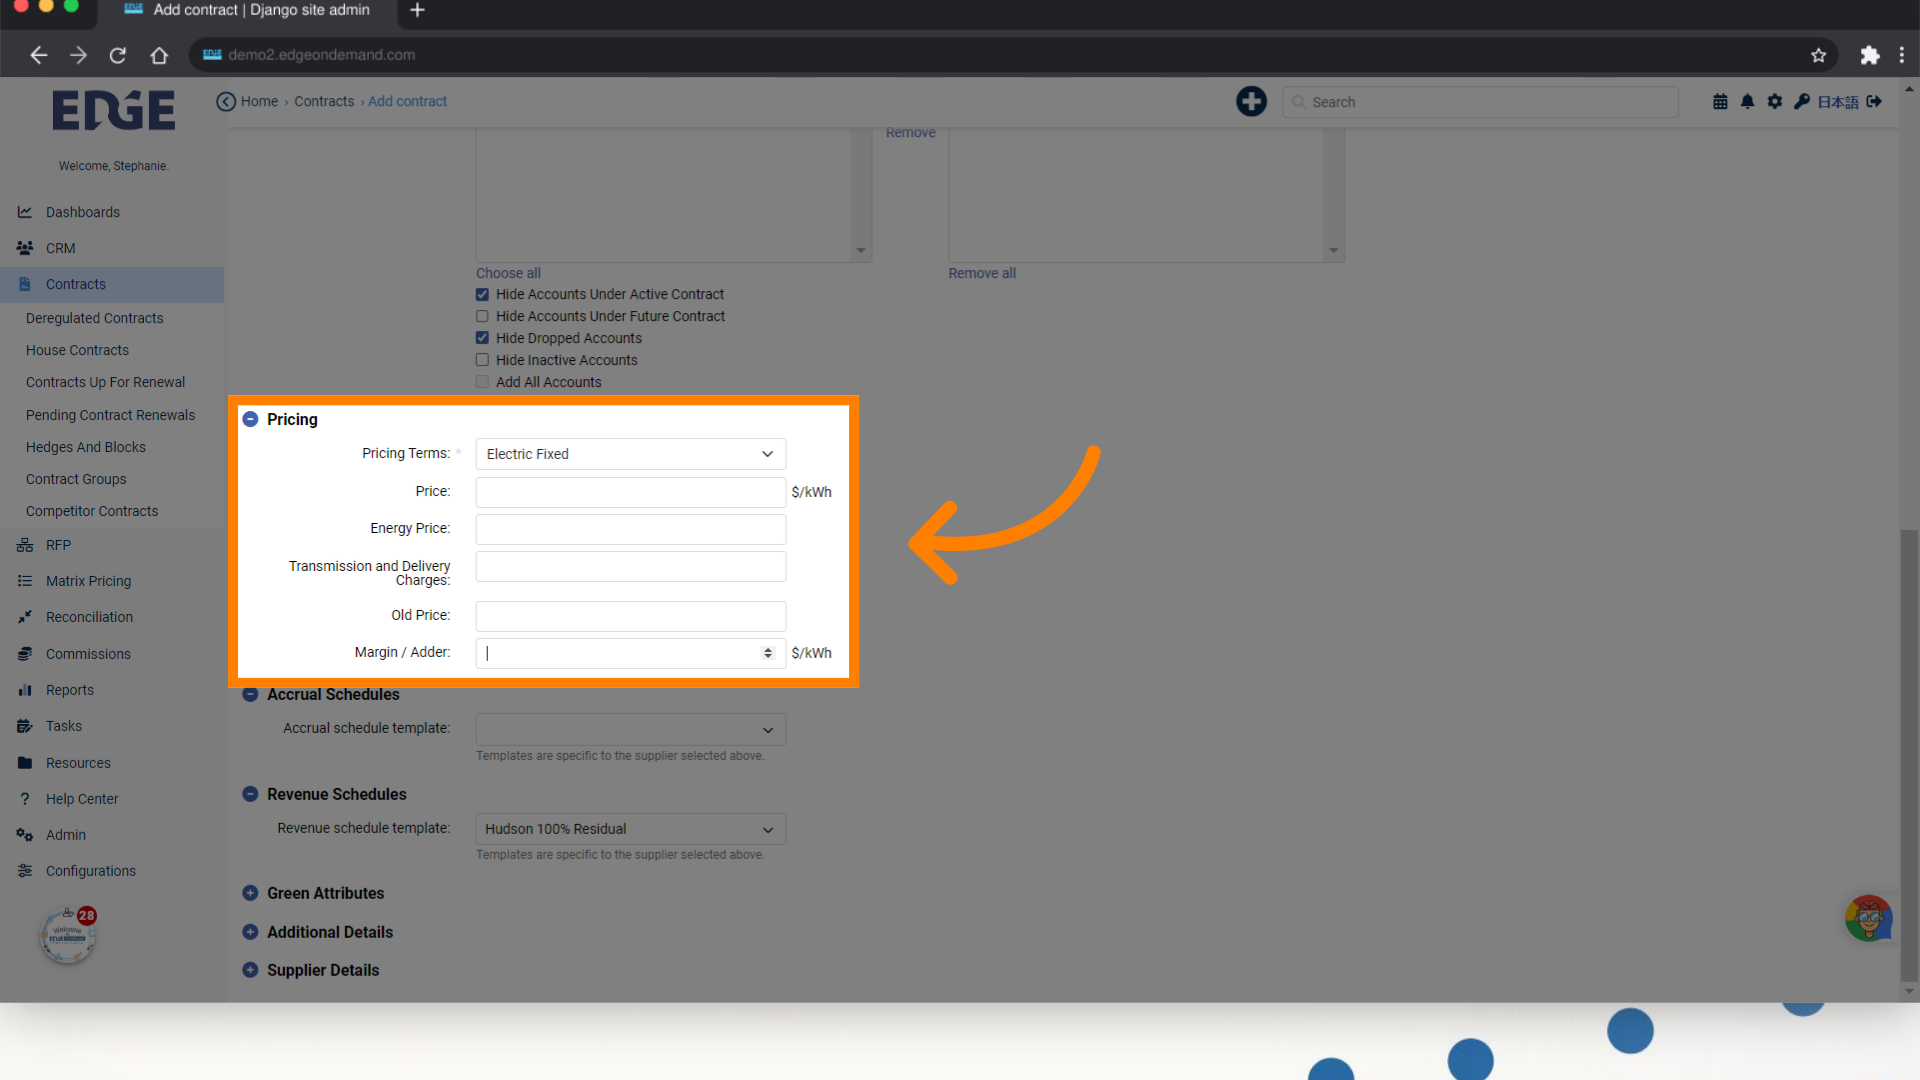
13. Input relevant Pricing information
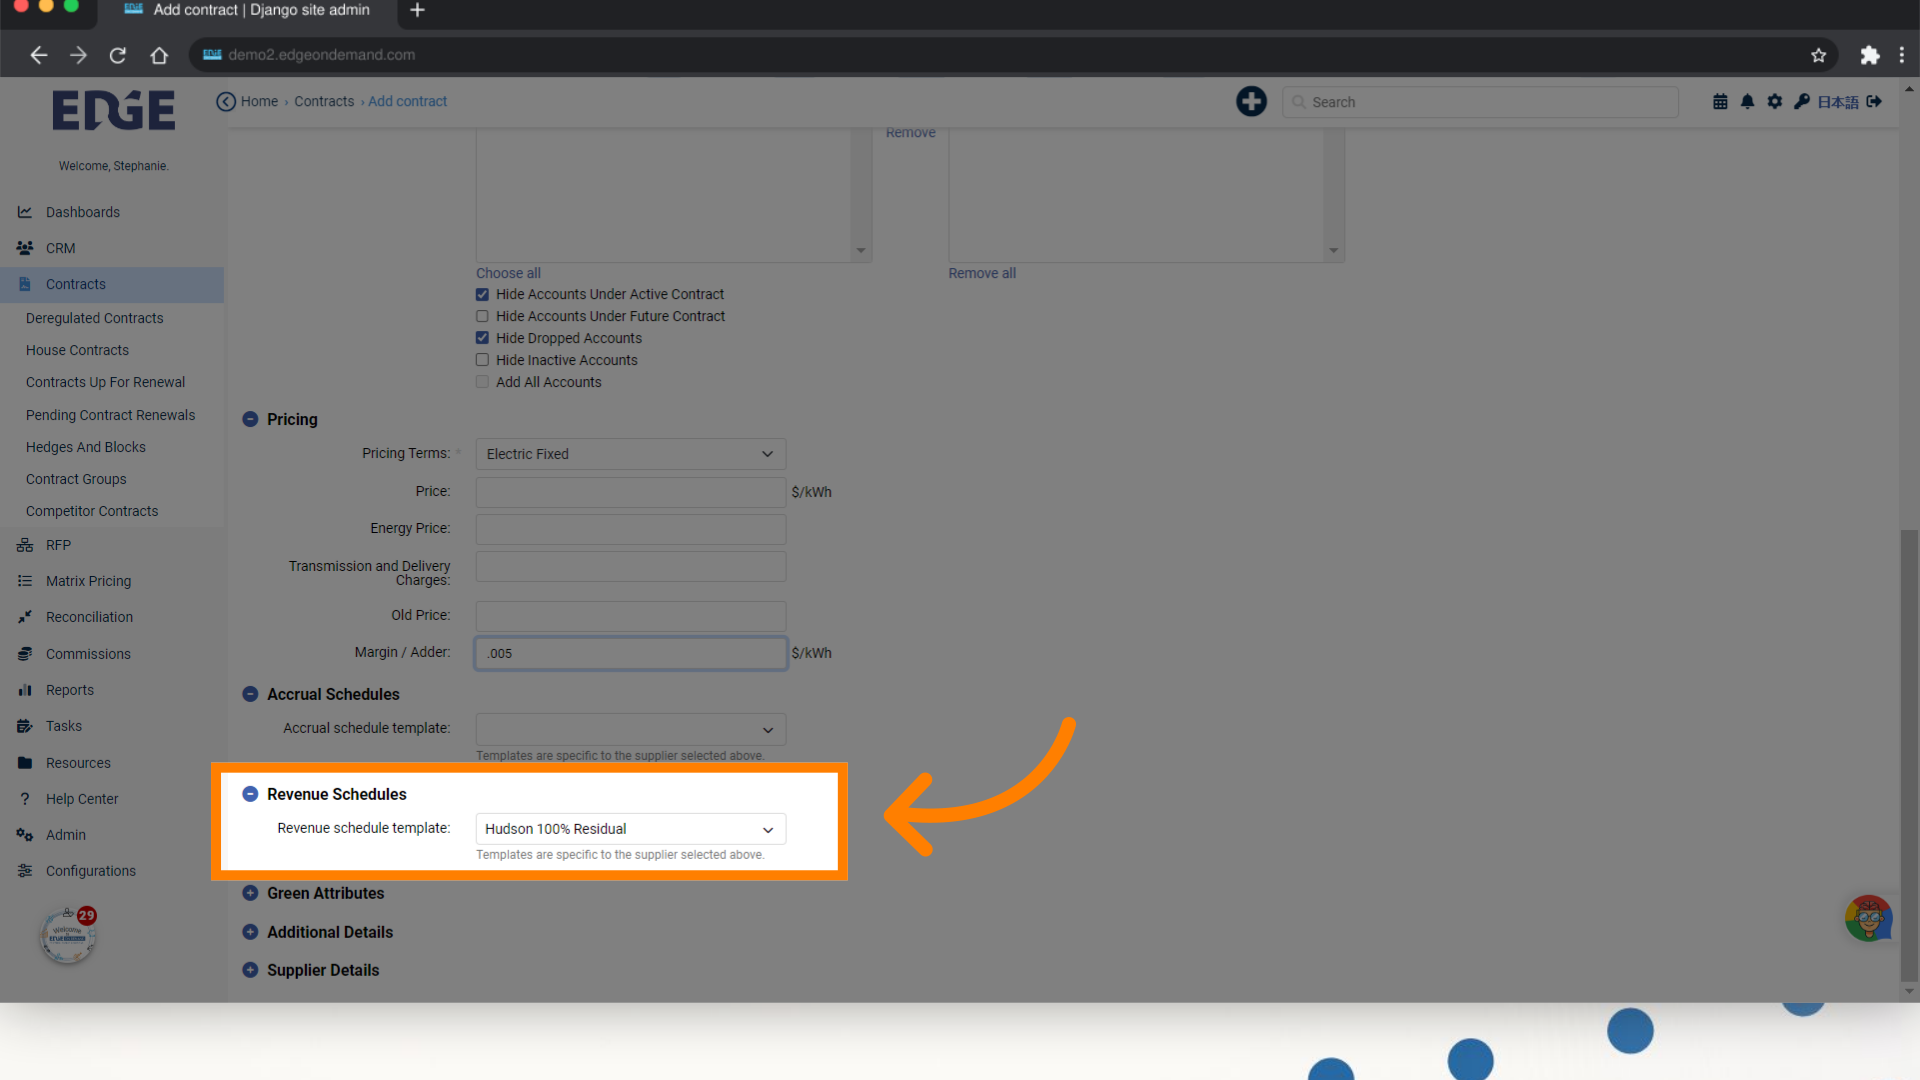
14. Select a Revenue Schedule according to the Supplier selected. If a RS template is marked 'Default', it will auto-populate.
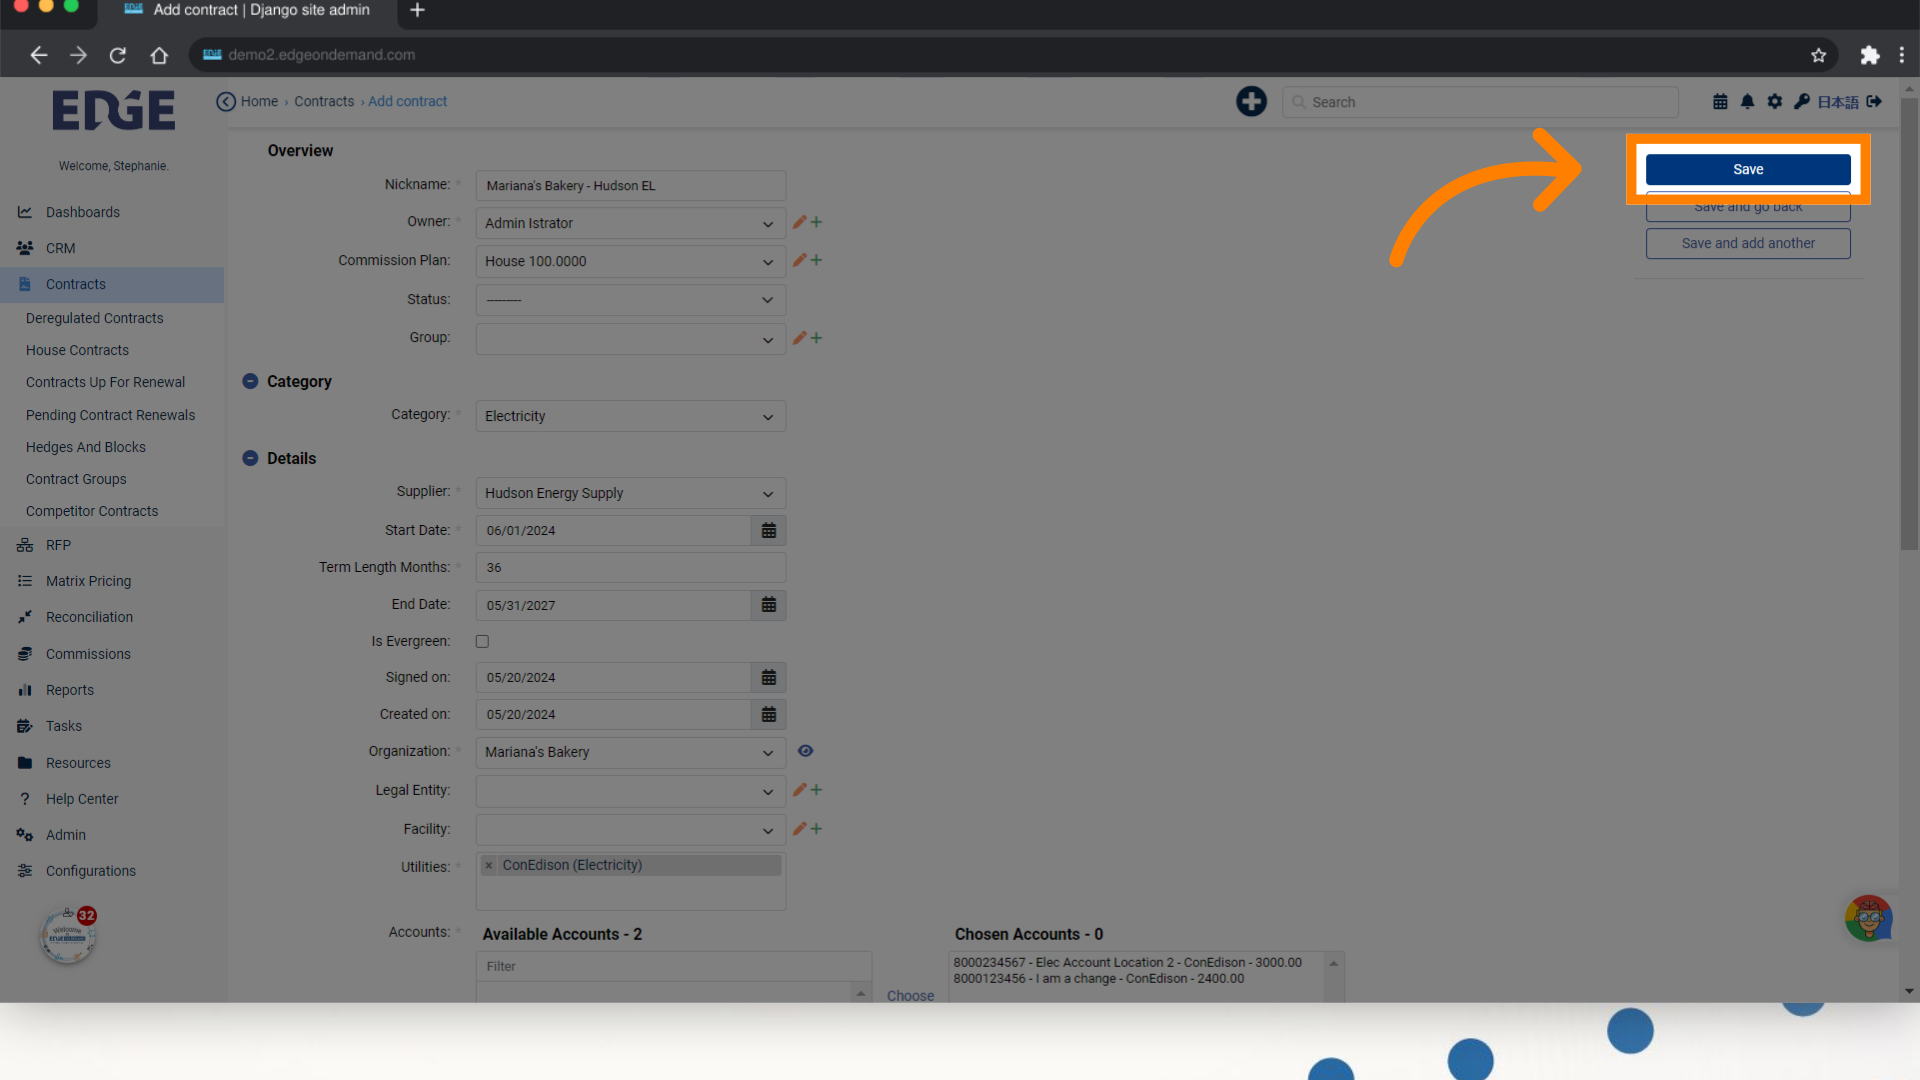
15. When satisfied, click "Save"
16. Once saved, you'll be taken to your newly created contract with additional tabs to input information

This guide covered the steps required to in Edgeondemand.
Was this article helpful?
That’s Great!
Thank you for your feedback
Sorry! We couldn't be helpful
Thank you for your feedback
Feedback sent
We appreciate your effort and will try to fix the article